Reflection Secure Shell Proxy Setup
To support file exchange using the Reflection Gateway Transfer Sites, you need to configure the Reflection Secure Shell Proxy to enable access by Reflection Gateway users.
To set up the Reflection Secure Shell Proxy to support Transfer Sites
-
Use the Windows Start menu to launch the Reflection Secure Shell Proxy console (Reflection for Secure IT Gateway > Reflection Secure Shell Proxy).
-
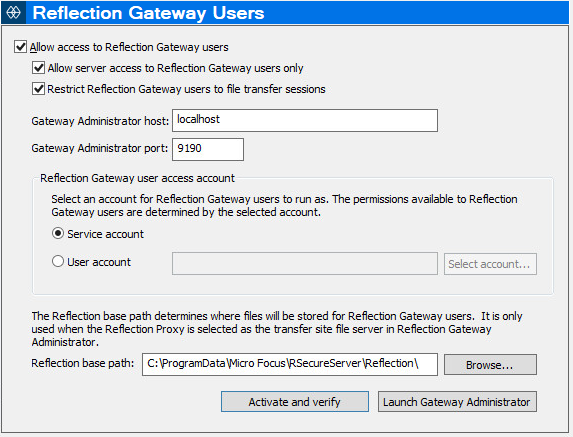
On the Reflection Gateway Users pane, enable Allow access to Reflection Gateway users.
-
For Gateway Administrator host, you can leave the default (localhost) for this evaluation. In a distributed environment, you would enter the name or IP address of the computer running the Reflection Gateway Administrator. Leave the default port value (9190). Reflection Gateway Administrator is configured to listen on this port by default.
-
Click Activate and verify. This saves your settings and triggers actions that ensure that the Reflection Gateway Proxy services can establish a secure connection with the Gateway Administrator.
-
You will be prompted to accept the certificate presented by the Gateway Administrator server. Click Yes to establish the trust relationship.
-
When the configuration update is complete, click Close to close the Web service connection dialog box.
-
Click Yes when prompted to restart the Reflection Transfer Server service. This step is required.

-