Working with Tables
Much of the data available in ScanCentral DAST is presented in tables. You can customize those tables and then save the customized views. Table preferences are saved per user.
The factory default view is named DEFAULT. You can edit the default view or use the default view to create custom views.
Customizing Table Views
You can edit existing views or create new views in the table preferences panel.

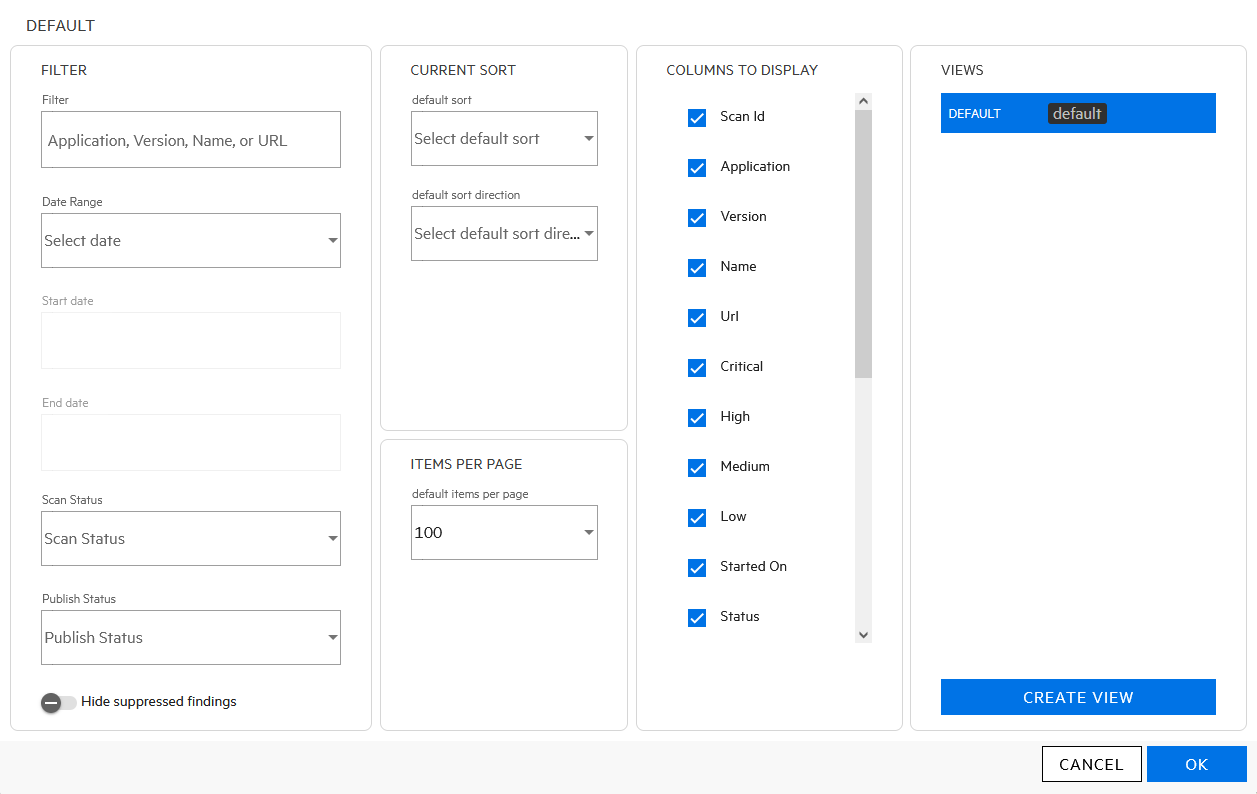
The table preferences panel enables you to customize the following:
-
Filtering (see Understanding Basic Filters in Tables and Understanding Advanced Filters in Tables)
-
Sorting (see Sorting Data in Columns)
-
Items Per Page (see Viewing Content on Multiple Pages)
-
Columns to Display (see Managing Columns in Tables)
Note: Not all preference options are available for all tables. Some tables include only a subset of the preferences.
Updating or Creating a View
After making changes to an existing view, you can either update the existing view or create a new view.
To update the original view with the new settings:
-
In the table preferences panel, click UPDATE <VIEW NAME>.
To create a new view using the new settings:
-
In the table preferences panel, click CREATE VIEW.
The CREATE VIEW dialog box opens.
-
In the View name box, type a name for the new view.
-
(Optional) To make the new view the default view, select Make default.
-
Click OK.
Selecting a Different View
To select an existing view:
-
Click the table preferences icon (
 ).
).The table preferences panel opens.
-
In the VIEWS list, select a view.
Note: If you have unsaved changes in the current view and attempt to switch views, you will be prompted that the changes will be lost.
-
Click OK.