Managing Columns in Tables
You can customize the order in which columns appear in tables, as well as change the columns to display in tables.
Rearranging the Columns
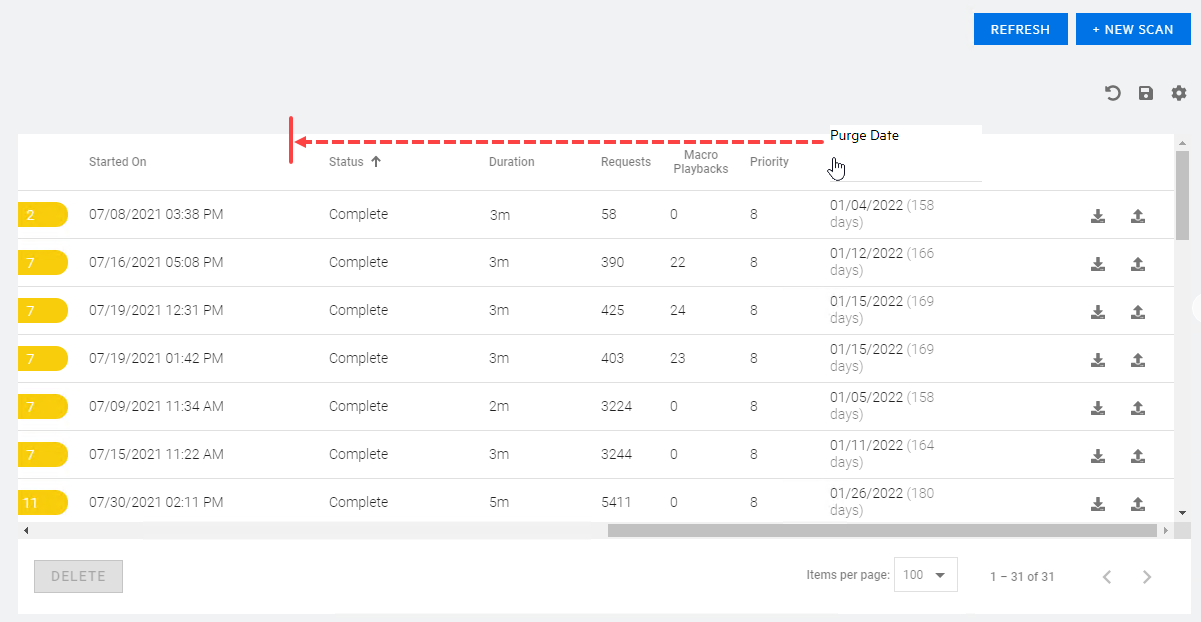
You can rearrange the order in which the columns appear in the table.
To move a column:
-
Click the column heading that you want to move.
-
Drag the column right or left and drop it into its new position.

Note: You cannot move the column of check boxes or columns containing icons, such as the download (
 ) and publish (
 ) icons.
Adding and Removing Columns
You can use the table preferences panel to select which columns of data you want visible in the table.
To add or remove displayed columns:
-
Click the table preferences icon (
 ).
).The table preferences panel opens.
-
In the COLUMNS TO DISPLAY area, do the following:
-
Select the column check box to display the column.
-
Clear the column check box to hide the column.
-
-
Click OK.
When New Columns Are Available
If you have customized a table view, such as added or removed columns, rearranged the order of columns, changed the sort order, and so forth, then when new columns of data are added to the table, you will not see them by default. Instead, the following message will appear near the top of the page:
New columns are available for the <table_name> table.
To view the new columns:
-
Click the table preferences icon (
 ).
).The table preferences panel opens.
To clear the message:
-
Click OK.
The message is cleared and will not appear again for the selected table unless new columns are added in a future update.