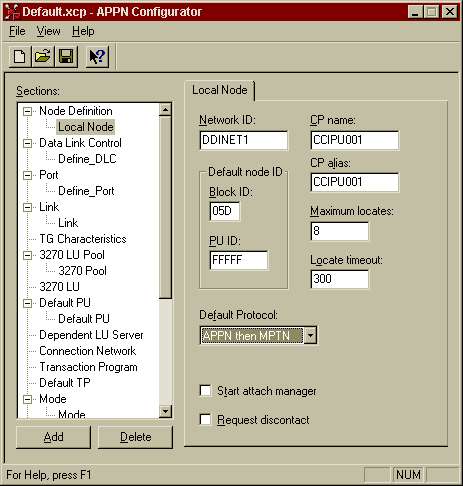
Select Node Definition from the Sections window and then click the Add button. The Local Node Configuration window will appear.
- Enter the Network ID for this SNA network. This should be obtained from the network administrator of the host system.
- Enter the Control Point (CP) name assigned to this machine. This should be obtained from the network administrator of the host system. The CP Name should match the Physical Unit (PU) name assigned to this machine as specified in the PU definition in VTAM for this machine.
- Enter the CP Alias, This should duplicate the CP Name.
- Enter the Default Node ID (Block ID, PU ID) This is the 8 digit hexadecimal number which is used to identify this local system on the SNA network.. The first 3 digits is the block (IDBLK) number followed by the last 5 digits of the node (IDNUM) number. These numbers usually correspond with the IDBLK and IDNUM fields of the PU definition for this machine as defined in VTAM on the host system, however EXTRA requires that the PU ID be set to FFFFF.
- The Maximum locates and Locate timeout parameters can be left to the default values.
- The Start attach manager check box should be unselected. This does not need to be selected if only running CCIAPPC clients (e.g. Fileshare clients). The attach manager is only needed for incoming APPC requests, for example if running CCIAPPC servers.
- The Request discontact check box can be left unselected.


