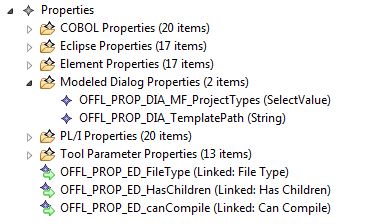


To make it easier to see the organization of large models, the AWM model editor enables you to group certain model objects. An example of object grouping is shown in the figure below:

You can create model editor groups for all model objects which have an ID attribute, for example Action Descriptors, Properties, Tool Descriptors, and so on.
You can create a group by selecting one or more objects and clicking the Assign to Group action.

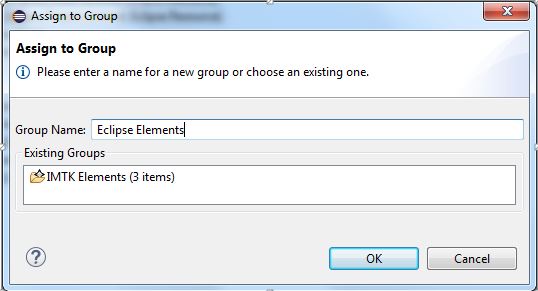
This opens the Assign to Group dialog box. You can specify a new group name or select an existing group.

To create a new model editor group:
To merge the object into an existing group:
Alternatively, you can assign objects to existing groups by dragging them onto the desired group. To assign items to a group, copy or cut and then paste. This opens an Enter ID dialog box, prompting you for a new object ID. When using cut and paste you are not required to change the original object ID.

Assigning objects to a group also works on objects which already belong to a group. You can assign objects from different groups, including ungrouped ones, to a single target group.
You can assign newly created model objects to existing groups by executing the corresponding New Child action on an existing group, or New Sibling on a grouped object.

To remove items from a group, you can either use the Remove from Group action or drag them onto an ungrouped object of the same type.

When a group does not contain any more items it automatically disappears. Deleting a group removes all of the objects it contains.
You can rename a group by selecting it and clicking Rename Group action.


