If a Welcome window appears when starting for the first time, close it or click Open Team Developer Perspective.
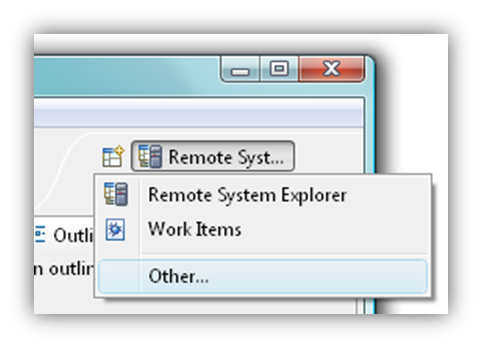
 symbol and then selecting
Other… .
symbol and then selecting
Other… .
 in the list, and then click
OK.
in the list, and then click
OK.
Enterprise Developer displays the Team Developer perspective.
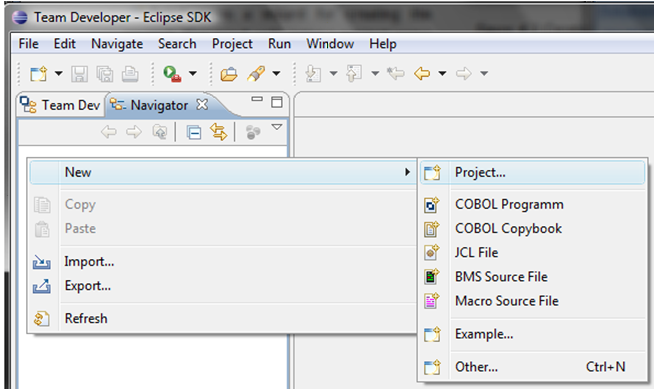
The standard type “Project” is the most suitable here, and can be found under the category “General”. Double-clicking
 opens a wizard for creating the project. You need only enter a project name such as “Model Configuration” into the top text field and close the wizard with Finish.
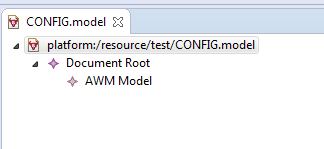
Right-click the newly created project in the Team Developer Tree view and click New > Other… to display a dialog for the creation of new files. The category “AWM” can also be found here, under which the file type “AWM Model” is located. Double-clicking AWM Model opens a wizard. Enter an appropriate file name (such as CONFIG.model) and then close the wizard with Finish. A new AWM model called CONFIG.model appears in the Project Explorer View, which is then displayed in the Editor.
The AWM model editor shows all modeled types and relationships in a tree structure. Their attributes can be viewed and edited in the Eclipse Properties view. The Properties view is located in the Team Developer Perspective in the lower left corner. If the Properties view is not visible, it can be displayed by right-clicking Show Properties View in the Model editor.
The first line in the Model editor represents the resource that is currently being worked on. The next level of the hierarchy will be displayed by clicking
 to the left of the row. There is a “Document Root” in every AWM model, in which global, non-configurable attribute definitions are stored. Another click on
shows the next level, "AWM Model". Categories for all object types can be defined here.
to the left of the row. There is a “Document Root” in every AWM model, in which global, non-configurable attribute definitions are stored. Another click on
shows the next level, "AWM Model". Categories for all object types can be defined here.
As categories are children (sub-elements) of "AWM Model", they must be created via the function “New Child” from the context menu of “Model Configuration”. To create the “Properties” category, click New Child > Properties.
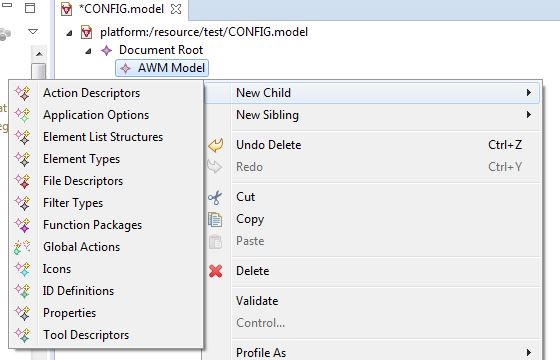
In the same way, a property can now be defined via the context menu of the newly created “Properties” category (). A further right-click on Property shows that there is no further hierarchical level under Property, as no further children can be defined. New siblings (elements of the same level) of a type can be defined via New Sibling, which could be additional properties in the case of “Property”.
If an object type is selected, the attributes will be displayed in the Properties View.
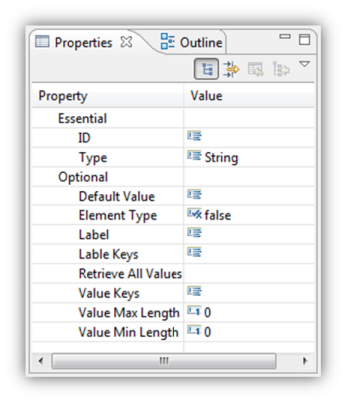
The values of the attributes can be edited in the right-hand column (Value). Depending on the type of the attribute, values can be entered or selected in the fields of the right column. If standard values exist for attributes, their fields will be automatically filled in.
The first attribute of a Property (ID) requires manual input. The second (type) allows a selection of certain values. These can be selected by a mouse click, by clicking twice on the corresponding field in the Value column.
The Retrieve All Values attribute requires a reference to an action descriptor. As none has been defined so far in this case, no value can be modeled in the field for the moment.
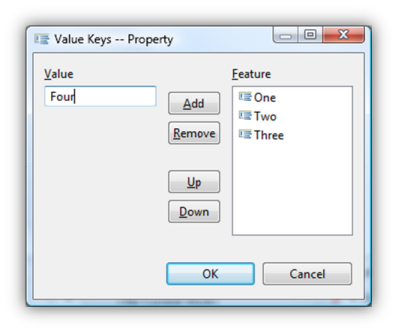
The Value Keys attribute permits the entry of several values. A click on the Value field of this attribute causes a button to appear ( ). Another click on this button opens a dialog in which the individual values can be added or removed.
In addition, new values are entered into the left field and are added using Add. Existing values can be removed with Remove or be moved with Up and Down.
Some attributes can have string values with multiple lines (marked with "multi line" in tables in Tool descriptor, Relationship: Tool has Input Parameter. Double-clicking their input fields in the Properties View will open an input dialog with a text area in it where you can enter or edit a string with several lines.
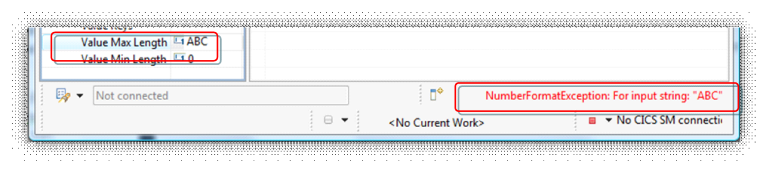
A string has been entered into a number field here. Disallowed values cannot be assigned to attributes.
If an attribute is selected, help text appears at the lower edge of the window. This is either a short description of the attribute, or, in the case of an incorrect entry, an error message.
In the case of long Help texts, it can be useful to hover the mouse over the text in order to have the message displayed in full.
Relationships and complex attributes can be configured in the same way. Both are children of the corresponding object types (e.g. element type, tool descriptor.…), are created with “New Child”, and are modeled in the Properties view.
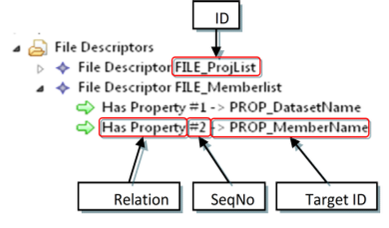
Relationships differ from other types in the Editor through their presentation, however. Their target ID is shown directly in the label. Any sequence numbers (SeqNo) that occur will also be shown in their label.
The deletion of object types is carried out from their context menu with the Delete function. Deleting an object type also removes all levels below it. If something is deleted by mistake, it can be recovered using the Undo function in the context menu of the model editor.