Creating and Configuring a Launch Configuration
A launch configuration is an instance configuration template that an Auto Scaling group uses to launch EC2 instances. Creating a launch configuration requires collecting some infrastructure data, specifically the Amazon Machine Image ID (AMI ID) and instance type. You can have more than one launch configuration created with different parameters, such as instance type or root volume size, and instantiate the auto-scaling groups from them.
- Using the Find Services search tool, locate and browse to the EC2 Dashboard.
- In the left navigation panel, under Auto Scaling, select Launch Configurations.
- On the Launch Configurations page, click Create Launch Configuration.

- On the Create Launch Configuration page, specify values for the following:
- Launch configuration name: Specify your launch configuration name.
- Virtual machines HW and OS: Specify the virtual machine hardware and installed operating system.
- Under Additional configuration details - optional, specify values for the following (mandatory) settings:
- IAM instance profile: Choose the instance profile name for the worker nodes from the AWS worksheet.
- User data: Leave As text selected, then copy the contents of the script
workernodes-userdatalocated in theaws-scriptsfolder. In the text area, replace the<cluster name>with your own cluster name from the AWS worksheet. - IP address type: select Do not assign a public IP address to any instances.
zk:yes, kafka:yes, th-platform:yes, and th-processing:yes. Each created automatically receives the respective labels required for running Transformation Hub. For more information about labels, see Labeling Nodes.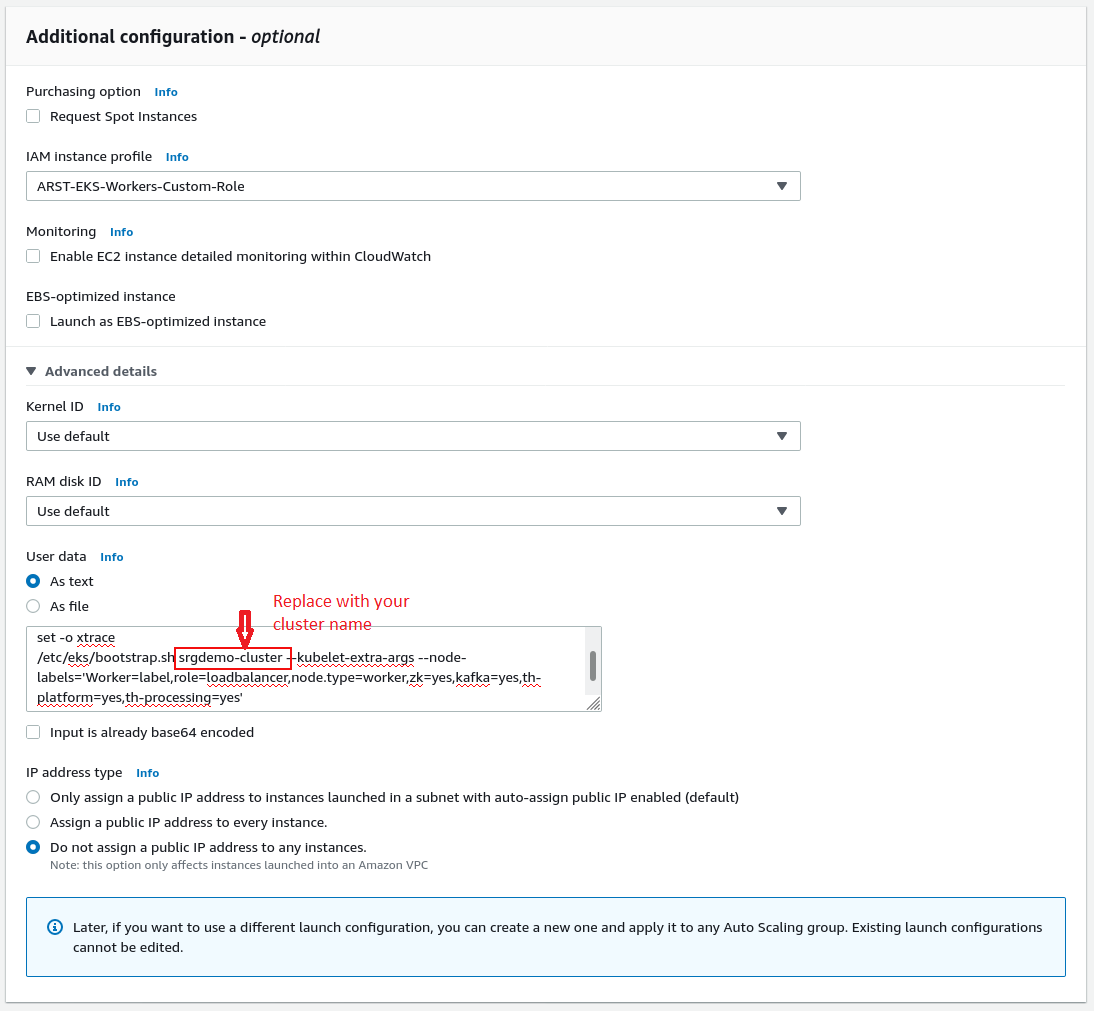
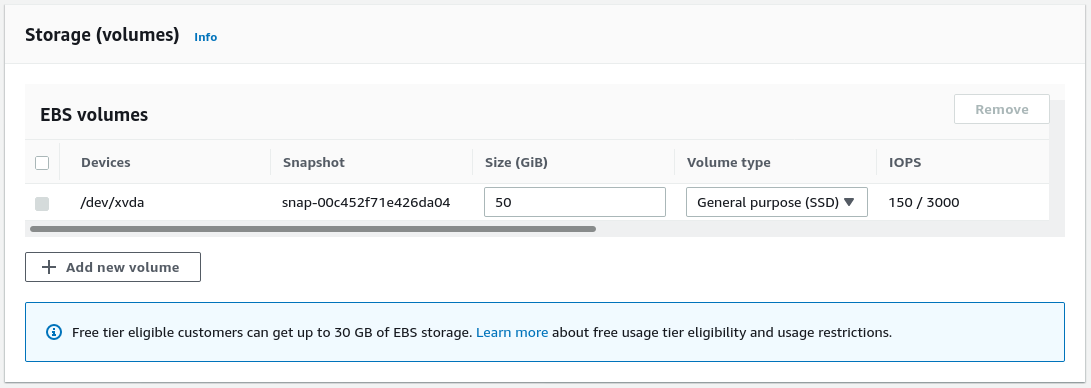
- Under Storage, configure the storage for each node. Specify the following settings:
- Size (GiB): Change the size to minimum 50 GiB or more depending on your plans for product installation and load.
- Scroll to the right and select Delete on termination.
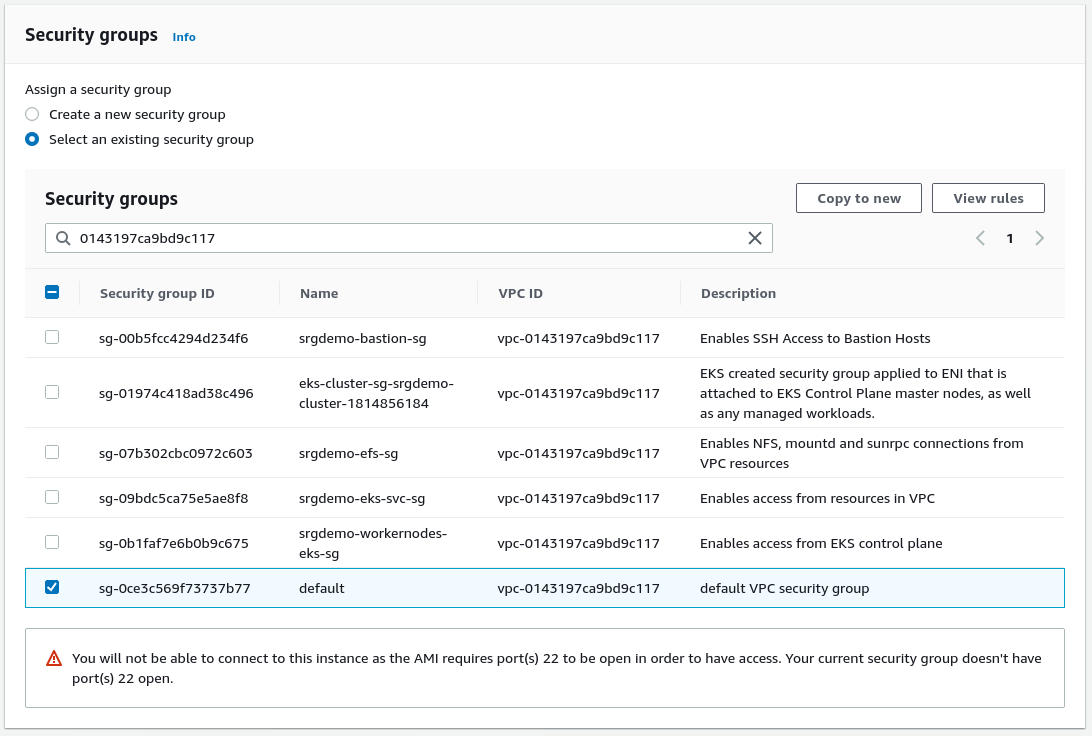
- Each resource must be accessible through the network and all worker nodes must have the correct security groups assigned to them.
- Under Security groups, choose Select an existing security group.
- Choose the security group created for intra-VPC communications, recorded in the AWS worksheet.
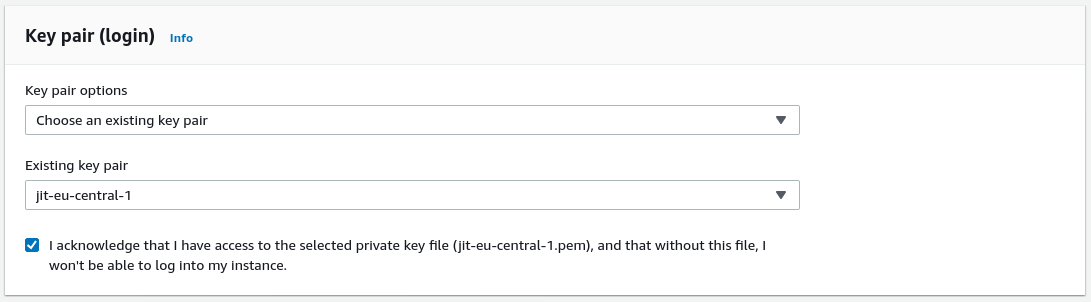
- Create a key pair to allow cluster access as well as SSH access to the worker nodes.
- Under Key pair (login), choose values for the following:
- Key pair options: Select Choose an existing key pair.
- Existing key pair: Choose your key pair for which you own the private part.
- I acknowledge... : Select in order to proceed with launch configuration creation.
- Click Create launch configuration to create the new launch configuration.
- Run the following command:
aws autoscaling create-launch-configuration \
  --launch-configuration-name <Launch Configuration name> \
  --image-id <Launch config AMI Id> \

  --key-name <Key pair name> \

  --security-groups <Intra VPC Security group Id> \

 --instance-type <Instance type> \

 --block-device-mappings "<block device mapping>" \

 --iam-instance-profile <Workernodes Instance profile ARN> \
  --no-associate-public-ip-address \
  --user-data file://<user data filename>
Where:
<Launch Configuration name>: Choose a name that helps with easier identification. In our examples we will use srgdemo-workers-launch-config. Record the chosen value in your AWS worksheet.
<Launch config AMI ID>: Run the following command to get the actual AMI ID. aws ec2 describe-images \--filters "Name=architecture,Values=x86_64" "Name=name,Values=amazon-eks-node-<Kubernetes version>*" | jq '.Images | map(select((.Description!=null) and (.Description | contains("GPU") | not) and (.ImageLocation | contains("gpu") | not))) | sort_by(.CreationDate) | [last]'
<Kubernetes version> with the Kubernetes version number you used to create the EKS, and recorded as the Kubernetes version in your AWS worksheet. Retain the asterisk at the end of the value for the name filter.<Key pair name>: Use the key pair name from the AWS worksheet.
<Intra VPC Security group Id>: ID of Intra VPC security group recorded in the AWS worksheet.
<Instance type>: From Amazon EC2 Instance Types, choose your machine hardware configuration. Consider CPU, RAM, storage type, network performance, and price.
DO NOT USE the same type you used for the bastion.
<block device mapping>: Pass the value DeviceName=<root device name>,Ebs={VolumeSize=<root volume size>,VolumeType=gp2,DeleteOnTermination=true}
where:
<root device name>: In the description obtained for AMI ID above, locate the value for keyRootDeviceName.<root volume size>:Size depends on planned installation size: 50GB for SMALL, 100GB for MEDIUM, and 256GB for LARGE. Sizes refer to the sizes from ArcSight Suite metadata definition, in gigabytes.
<instance profile ARN>: Use the instance profile ARN you created above or created by your AWS infrastructure administrators and recorded in your AWS worksheet.
--user-data file://<user data filename>: This file needs to be modified before you execute the command. Copy the file workernodes-userdata located in aws-byok-installer-<version>/scripts/ to the current working directory on the local host or on the bastion, then edit. Replace the parameter cluster name with the value from the AWS worksheet.
Example of workernodes-userdata:
#!/bin/bash
set -o xtrace
/etc/eks/bootstrap.sh srgdemo-cluster --kubelet-extra-args \
--node-labels='Worker=label,role=loadbalancer,node.type=workerlancer,node.type=worker'
Extending labels, as shown here, during the launch configuration creation will be important for scaling up the cluster later. However, if you do not assign labels automatically, you must manually add new labels every time you add a new node.
Example:
aws autoscaling create-launch-configuration \
--launch-configuration-name srgdemo-workers-launch-config \
--image-id ami-025291add34df213c \
--key-name srgdemo \
--security-groups sg-0ce3c569f73737b77 \
--instance-type m4.2xlarge \
--block-device-mappings "DeviceName=/dev/xvda,Ebs={VolumeSize=50,VolumeType=gp2,DeleteOnTermination=true}" \
--iam-instance-profile arn:aws:iam::115370811111:instance-profile/srgdemo-workernodes-instance-profile \
--no-associate-public-ip-address \
--user-data file://workernodes-userdata
Next Step: Create the Auto Scaling Group