Creating the AWS Auto Scaling Group
AWS Auto Scaling enables you to build scaling plans that automate how groups of different resources respond to changes in demand. You can optimize availability, costs, or a balance of both.
- Using the Find Services search tool, locate and browse to the EC2 dashboard.
- In the left navigation panel, under Auto Scaling, select Auto Scaling Groups.
- On the landing page, click Create Auto Scaling Group to launch the creation wizard. If no Auto Scaling groups have been created yet, the introduction to Auto Scaling implementation in AWS is displayed.
- On the Choose launch template or configuration page, specify values for the following:
- Name: Specify a descriptive name for the Auto Scaling group.
- Launch configuration: Click Switch to Launch template, then select the launch configuration you created previously.
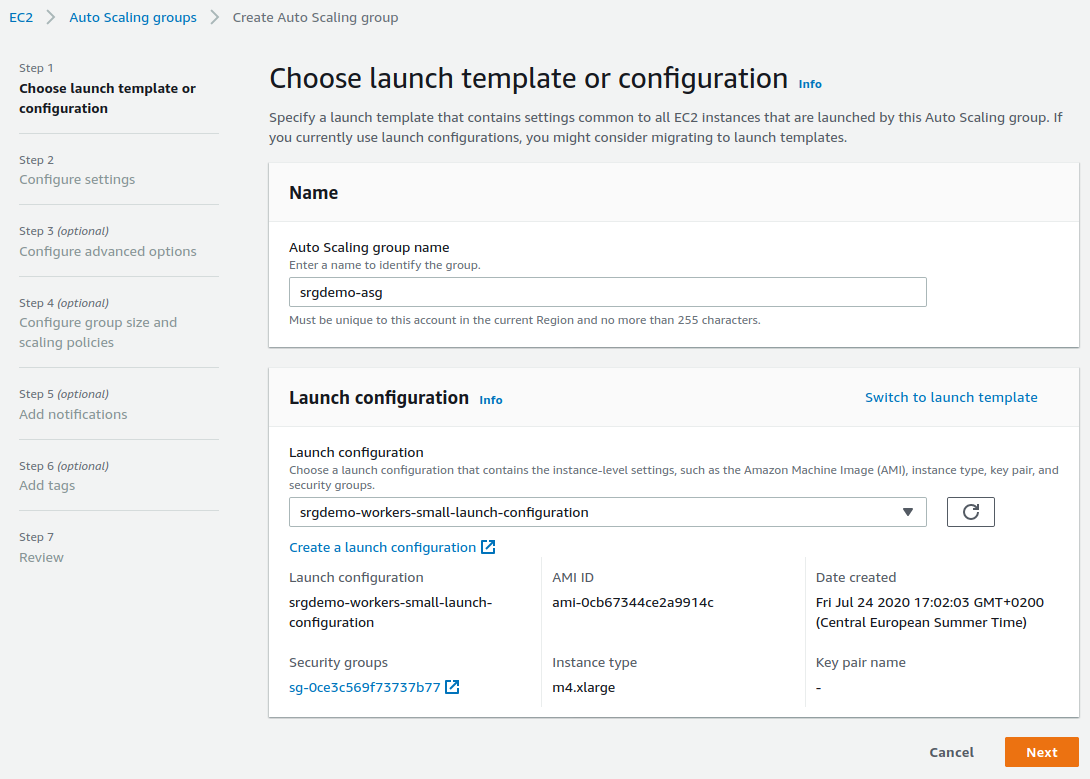
- Click Next.
- On the Configure settings page, specify values for the following:
- VPC: Select the previously-created VPC that you recorded in the AWS worksheet.
- Subnets: Select all 3 private subnets (from the AWS worksheet).
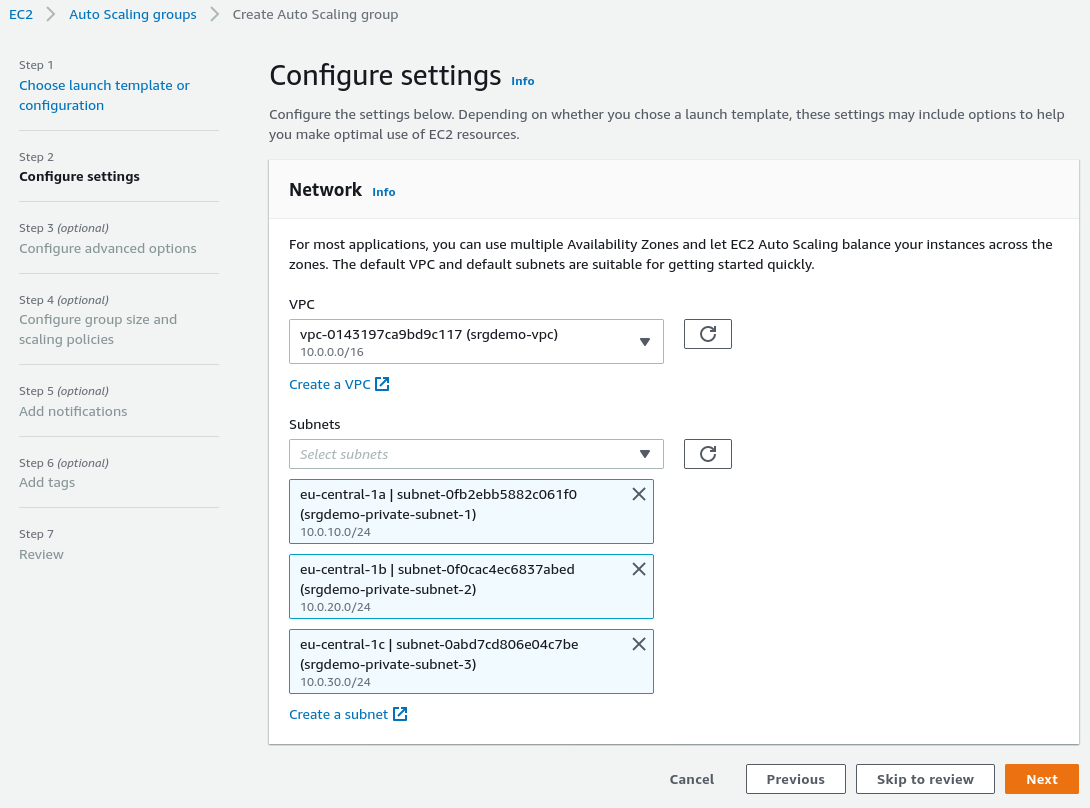
- Click Next.
-
On the Configure advanced options page, leave all values set to their defaults and click Next.
-
On the Configure group size and scaling policies page, set values for Desired capacity and Maximum capacity. In the example shown here, there will initially be three nodes and enough space to instantiate two more by simply increasing the desired capacity. (For a production cluster, the minimum capacity setting should not be less than two.)

-
Click Next.
-
On the Add Notifications page, ignore all settings and click Next.
-
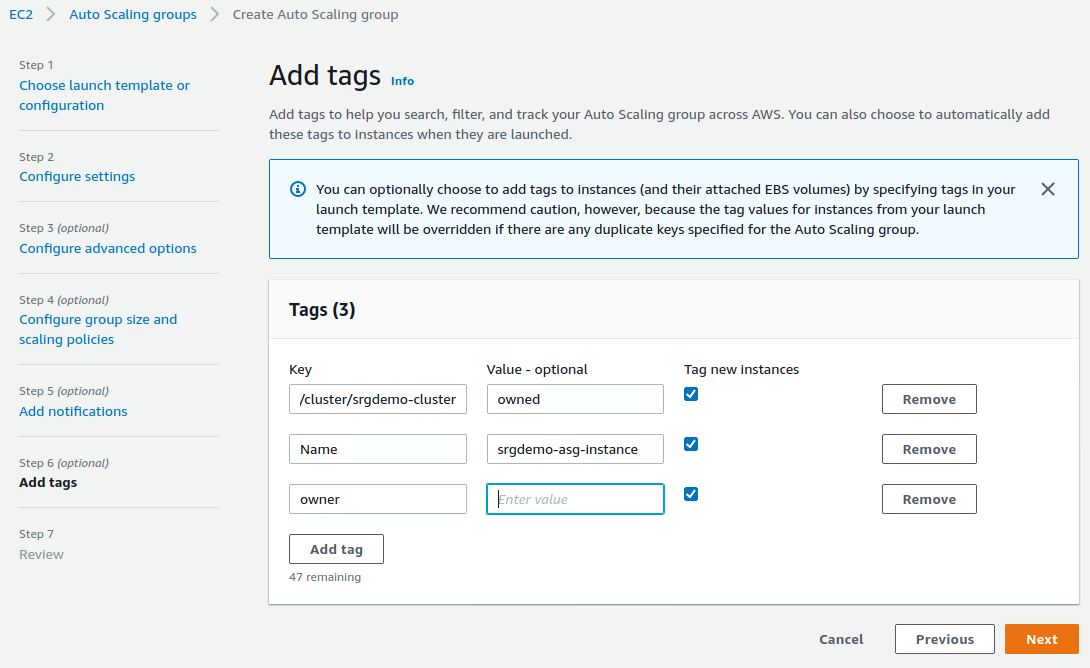
On the Add Tags page, add tags as follows:
-
Add the mandatory tag key:
kubernetes.io/cluster/<your cluster name>with value:owned(replace<your cluster name>with your actual cluster name). -
(Optionally) Add these tags as desired:
- Key:
Namewith value: derived from the auto-scaling group name. - Key:
ownerwith value: specify your own name as a tag.
- Key:
- For all new tags you add, select Tag new instances so new instances are automatically tagged.
-
- Click Next.
- On the Review page, verify your settings, then click Create an Auto Scaling Group.
- For networking configurations, we will need to know the machine instance IDs in the new Auto Scaling group. On the Auto Scaling Groups management page, select your new group.
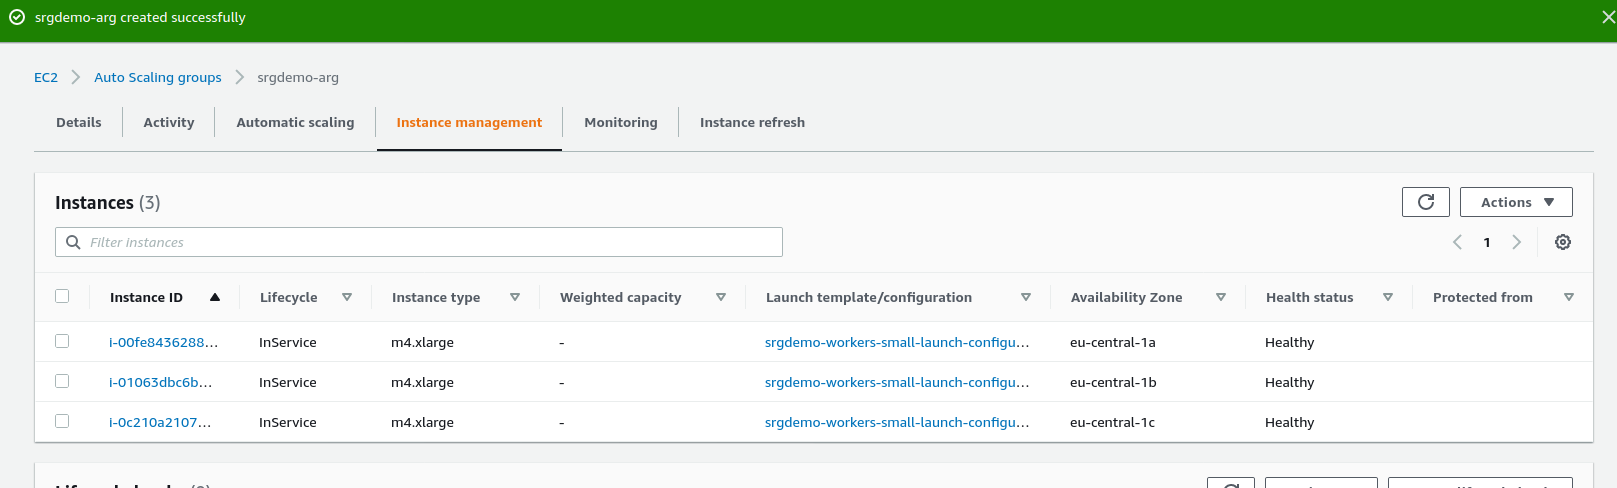
- From the Instances tab, record all instance IDs in the AWS worksheet.
- Run the following command:
aws autoscaling create-auto-scaling-group \
--auto-scaling-group-name <Autoscaling group name> \
--launch-configuration-name <Launch Configuration name> \
--min-size <min size> \
--desired-capacity <desired size> \
--max-size <max size> \
--tags "Key=kubernetes.io/cluster/<cluster name>,Value=owned" "Key=Name,Value=<auto scaling group name>" \
--vpc-zone-identifier "<subnet Ids>"
Where:
<Autoscaling group name>: Specify a name which helps with easier group identification. In this guide we will use srgdemo-autoscaling-group. Record the value in the AWS worksheet.
<Launch Configuration name>: Name of the launch configuration created above.
<min size>: The minimum size of the group (for a production cluster, this should not be less than two).
<desired size>: The number of Amazon EC2 instances that the Auto Scaling group attempts to maintain. This number must be greater than or equal to the minimum size of the group and less than or equal to the maximum size of the group. If you do not specify a desired capacity, the default is the minimum size of the group.
<max size>: The maximum size of the group.
<Cluster Name>: Use the cluster name from the AWS worksheet.
<subnet Ids>: A comma-separated list of private subnet IDs for your virtual private cloud (VPC). Use values from the AWS worksheet.
Example:
aws autoscaling create-auto-scaling-group \
--auto-scaling-group-name srgdemo-autoscaling-group \
--launch-configuration-name srgdemo-workers-launch-config \
--min-size 1 \
--desired-capacity 3 \
--max-size 3 \
--tags "Key=kubernetes.io/cluster/srgdemo-cluster,Value=owned" "Key=Name,Value=srgdemo-autoscaling-group" \
--vpc-zone-identifier "subnet-0fb2ebb5882c061f0,subnet-0f0cac4ec6837abed,subnet-0abd7cd806e04c7be"
It can take approximately five minutes for nodes to be created and join the cluster.
Retrieve the instance IDs from auto-scaling group
For networking configurations, we will need to know the machine instances in the new Auto Scaling group.
To retrieve the instance IDs:
- Run the command:
aws autoscaling describe-auto-scaling-instances\

| jq -r '.AutoScalingInstances[] | select(.AutoScalingGroupName=="<Your new Auto Scaling group name>").InstanceId' - Record the returned IDs in the AWS worksheet.
Example command and output:
aws autoscaling describe-auto-scaling-instances \
| jq -r '.AutoScalingInstances[] | select(.AutoScalingGroupName=="srgdemo-autoscaling-group").InstanceId'
i-05662f9ef84c182ca
i-07cfcd6716e9890b5
i-08d819b5ccabe83cb
After approximately five minutes, the nodes will be created and be joined to the cluster. You can then list all the worker nodes.
To list the worker nodes:
- On the bastion host, run the following command:
kubectl get nodes
At this point, you should see all nodes listed in the Ready state with the expected Kubernetes version.
Next Step: Labeling Worker Nodes