Scheduling a Rule Group
Schedules are shared by all rules in a group. You cannot schedule a rule by itself, but you can schedule it as a group of one rule by putting it in its own folder.
Note: You cannot schedule pre-persistence rules, so ensure the rule group you need to schedule does not contain any. If the group contains pre-persistence rules, move them to another group that you do not need to schedule. See Rule Types .
Where: Navigator > Resources > Rules > rule group
-
Identify the rules you want to schedule.
-
If these rules are not already in a rule group, create a rule group and link or move rules into it. For information on how to create and work with rule groups, see Managing Rule Groups.
-
Select a rule group, right-click, and select Schedule Rule Group.
The rule group's editor opens at the Jobs tab.
-
Click Add. Give this new job a name and description.
-
In Filter Results by, select a filter for this group of rules.
Caution: Make sure the filter you select does not use the following filter conditions:
- InActiveList - System performance will degrade if the filter condition includes InActiveList.
- End Time - You will lose the time range if you add End Time in your filter conditions. Manager receipt time (MRT) already takes care of time range, so End Time is not needed.

You can also use the Advanced Selector button to find the filter by name. See Using the Advanced Selector While Editing Resources for related procedure.
-
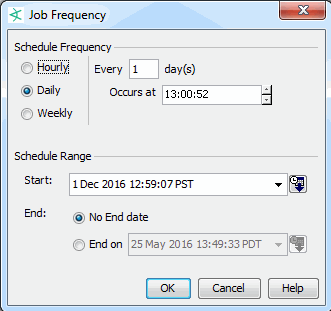
Click in the Summary field to set up the schedule frequency (hourly, daily, or weekly) and the schedule range (Start and End).

-
Save the schedule for the rule group.
The rules are deployed according to the schedule specified in the Rule Group editor on the Jobs tab, and are triggered if the rule conditions are met.