 previous
 next
next
These procedures enable Gateway Administrator to connect to your SFTP file servers.
Add the Reports File Server
If you are not still logged in, log on to Gateway Administrator using the default admin account.
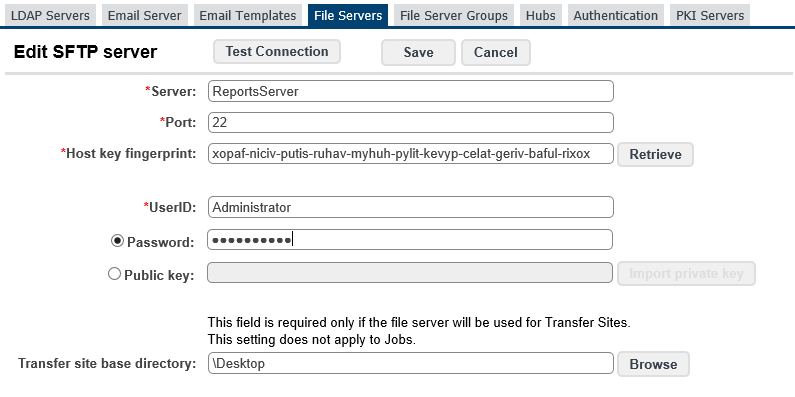
From the tab, click , then click .
Enter the server name (or IP address) of your Reports server.
Click to retrieve the host key.
For and enter the Windows user credentials for this server.
Click . (This tests the current on-screen settings. These settings are not saved until you click .)
Click .

Add the Transfer Site File Server
From the tab, click .
Enter the server name or IP address of your Transfer Site server, retrieve the host key, enter user credentials for this server, and test the connection.
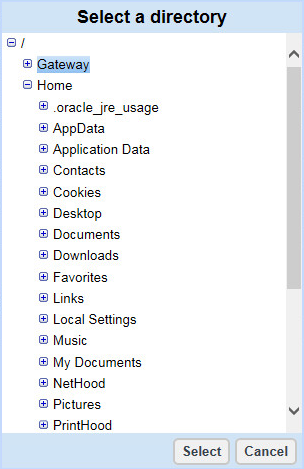
Next to , click . Select the Gateway directory that you made accessible on this server, and click .

This sets the for this server. By default, Gateway Administrator uses a Reflection subdirectory in the selected directory:

Click . This returns you to the tab.
Use the drop-down list to select the server you just added and click .

For this evaluation we are using passwords to authenticate to the added SFTP servers. Reflection Gateway also supports public key authentication. See Add File Servers to Gateway Administrator in the Administrator’s Guide.