 previous
 next
next
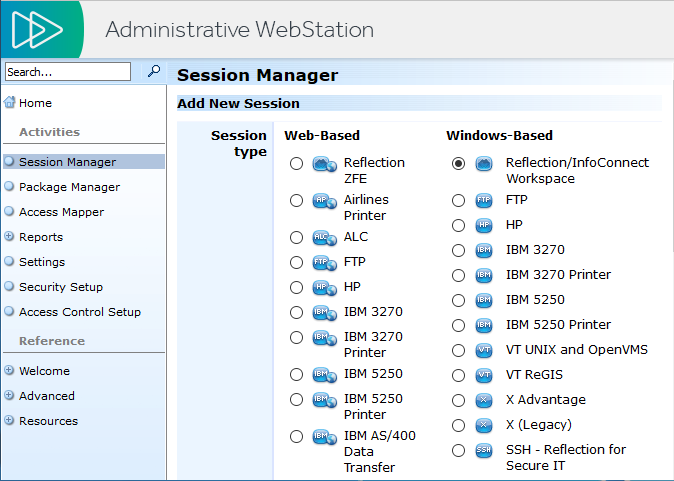
You can create and manage Reflection sessions using the Management and Security Server Session Manager, which is available from the Administrative WebStation. Sessions that you create in this way are saved to the server and can be made available to users from the server and modified at any time.
Requirements
Reflection must be installed on the Administrative workstation and on user computers. Make sure the users’ Reflection Desktop clients are configured to use Centralized Management as shown in “Set up Reflection to Access Management and Security Server” in the Reflection Help & HowTo Guide. If user workstations are not configured with this setting, you will need to configure and save this workspace setting in a custom workspace (.access) file and then deploy it to users (see Package Sessions and Custom Settings Files).
Java must be enabled in the browser you use to run the Administrative WebStation.
Management and Security Server must be installed on a server. You will need to know the administrative credentials to log onto the Management Server.
To create a centrally managed session
From a system running Reflection, open a web browser and start Management and Security Server by setting the URL to:
http://server:port/mss/AdminStart.html
Where server and port are replaced with the Management Server address. (Port is optional if you installed using the default.)
Log in as the server administrator.
Click .
Select and click .
From the list, select . Enter a value for and click .

(Optional) Change the defaults for where sessions will be stored on the end user's workstation and whether these files will overwrite existing user files.
NOTE:If you choose to overwrite existing user files, any changes that are made to the session outside of Administrative WebStation will be lost the next time the session is started.
Click .
Reflection opens in Administrative WebStation mode.
Configure your session settings, then save your session. When prompted, save your settings to the Administrative WebStation. If your session uses associated settings (such as a theme or keyboard map file), select to include these settings.

NOTE:When you save the session as a compound file, all of the QuickPads, keyboard maps, themes, mouse maps, hotspots, and ribbons that apply to that session are saved in the session file. Compound files simplify the deployment process because you do not have to deploy these settings in separate files. Custom workspace settings are not saved in compound session document files. These settings are saved in .access files or other files that you will need to package and deploy separately.
Click , then close the Workspace window.
After the confirmation that your session has been saved, appears, Click to specify which users have access to the file.

Deploy the sessions to end users. (See Make Centrally Managed Sessions Available to Users.)
To modify a centrally managed session
In a web browser, start Management and Security Server by setting the URL to:
http://server:port /mss/AdminStart.html
where server and port are replaced with the Administrative Server address.
Log on as administrator and click .
From the left pane, click .
Select the session you want to modify.
Click .
After you make changes, save the file as prompted.
Your modified session file replaces the existing session file of the same name on the Administrative Server.
When you launch Reflection from the Management and Security Server Administrative WebStation, the Workspace opens in Administrative WebStation Mode. Use this Workspace window to configure sessions for central management.
In Administrative WebStation mode:
When you save a session, the session is uploaded to the Management and Security Server; it is not saved on your workstation.
Options to configure the Security Proxy are available; these options are not available when you launch the Workspace directly.