Create a Unit Test Project and Test Program for Existing Code
The main benefit of this process is that the required linking from the test case(s) to the source code is generated automatically when creating the test program, and you are ready to start calling into the application logic. For ease of use, we recommend that you organize your solution/projects as described in Best Practice for Organizing Unit Test Projects when using this process.
- Ensure that the solution containing to application logic to be tested is open.
-
Double-click the
.cbl file containing the code on which to test.
The COBOL code is displayed in the editor.
-
Right-click anywhere in the editor, then select
Create Unit Test.
The Create Unit Test dialog box appears.
-
In the
Test project field, click
 and select
<New Test Project>.
Tip: If any unit test projects already exist in the solution, selecting an existing one here adds further unit tests to it.
 - In the New test project name field, type a name for the new project. The Project Location field also defaults to the value you enter.
- In the Project location field, type the name for the new directory that the project files will be placed.
-
In the
New test program name field, type the name of the test program file (.cbl file) to contain your tests.
Important: Ensure that your test program name is unique in the context of the containing solution.
-
In the
Test Type field, click
 and select the type of test cases to create in the test program file:
Type Description Unit Test A conventional unit test Data Driven (Delimited File) A test type designed to sequentially read data from a file and pass it through the same test(s) - Click Next.
-
If you are creating a conventional unit test, configure the test cases:
- Click the first entry in the Entry Point Name column and select the entry point that contains the code that you want to test.
-
In the
Test Case Name column, type a name for the test case.
The name defaults to the entry point name prefixed with "Test".
- To add another test case, click Add New, then repeat the previous steps.
-
If you are creating a data driven test case, specify the source file:
The Entry Point name defaults to the program name of the source code under test.
-
In the
Test Data File field, click
Browse and select the
.CSV file to use for the tests.
Note: We recommend that you do not select a data file that is already being used for data driven tests in test programs for other unit test projects in the same solution; ideally, you should use one data file for each test program - this can be a uniquely-named copy of an existing data file if required.
The data file is copied into the project if it does not already exist.
-
In the
Test Data Delimiter field, select the delimiter used within the file.
If the required delimiter is not listed, you can specify the correct one using metadata (MFU-MD-DD-DSV) within the test case.
-
In the
Test Data File field, click
Browse and select the
.CSV file to use for the tests.
-
Click
Finish.
Note: For conventional unit tests, you can add further test cases once the test program has been created.
The unit test project is created, which contains the specified test program, and then within that, the test case and test setup elements for each test case configured.
- The two copybooks required by the
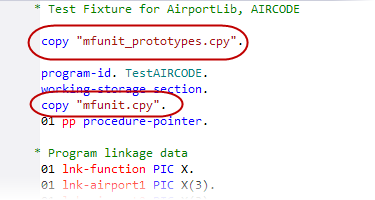
Micro Focus Unit Testing Framework are copied into the project.

- A test setup and a test case have been created.

- A procedure pointer has been added to the test setup that enables you to call into the application logic.

- The Linkage section from the source program has been replicated in the Working-storage section, initialized, and a CALL statement
coded in a test case.

- The Output path is set to the same directory as the output path for the application logic's project.