Creating a Story
You can create
 Quick or
 Detailed Stories in the
and
views.
Use Quick Story when you are adding lots of high level Stories.

In each perspective, look for New Story: Quick | Detailed.
For more information, see Using the Story Editor.
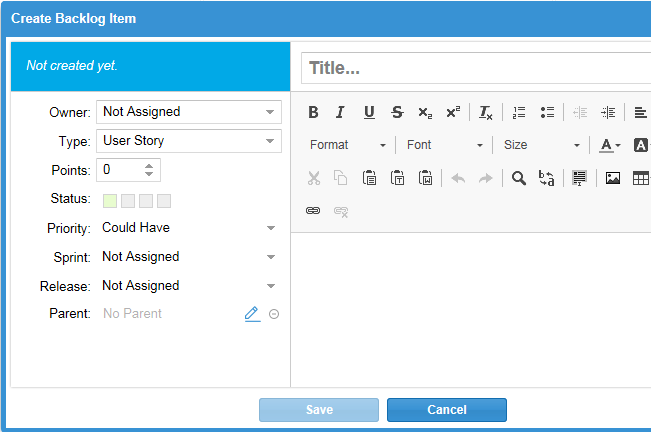
To create a detailed Story:
-
Click
 New Story: Detailed.

-
Enter the details for the Story:
- Title
- Enter a descriptive name for the Story.
- Owner
- Select the resource responsible for the Story.
- Type
- Select the Type of Story: User Story, Technical To Do, Epic, Theme, or Defect. For more information about Types, see Working with Stories.
- Points
- Enter the estimated number of Story Points required to complete the Story.
- Status
- Click one of the boxes indicating the status: Not Started, In Progress, Complete, or Accepted.
- Priority
- Select a Priority from the list: Must Have, Should Have, Could Have, or Won't Have.
- Sprint
- Select the Sprint for the Story, if needed.
- Release
- Select the Release for the Story, if needed.
- Parent
- The Parent Story is displayed. Click the link to display the Parent or click the Set Parent icon to change the parent.
- Description
- Add or edit the Story description.
- Click Save.

