9.4 How to create a new NSS volume?
-
In UMC, click
 Storage > Volumes.
 -
Click CREATE VOLUME.

-
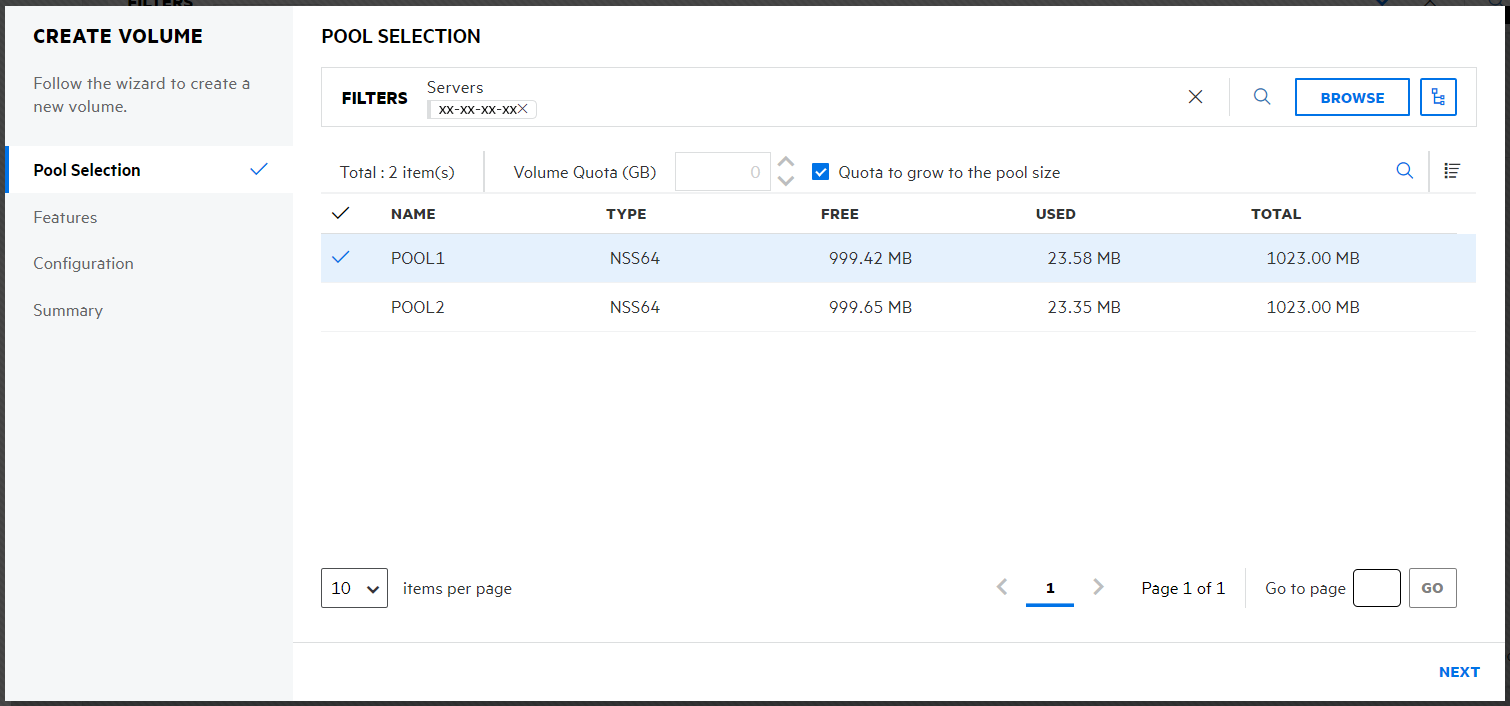
On the POOL SELECTION page, search or browse the server to select the pool where you want the new volume to reside, and click NEXT.

Specify the Volume Quota as required or select “Quota to grow to the pool size” checkbox to allow the volume to expand to the size of the pool.
-
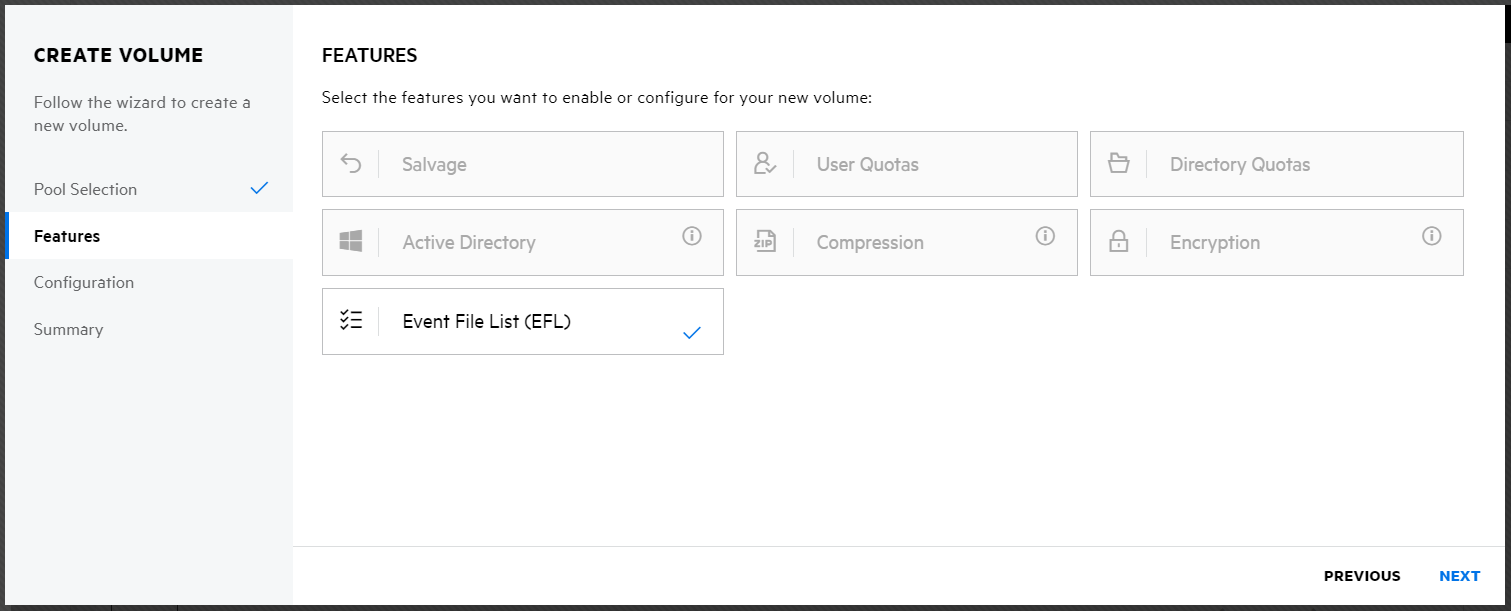
On the FEATURES page, select the features you want to enable for the new volume, and click NEXT.

NOTE:The feature, Event File List (EFL) is selected by default and you cannot deselect it.
-
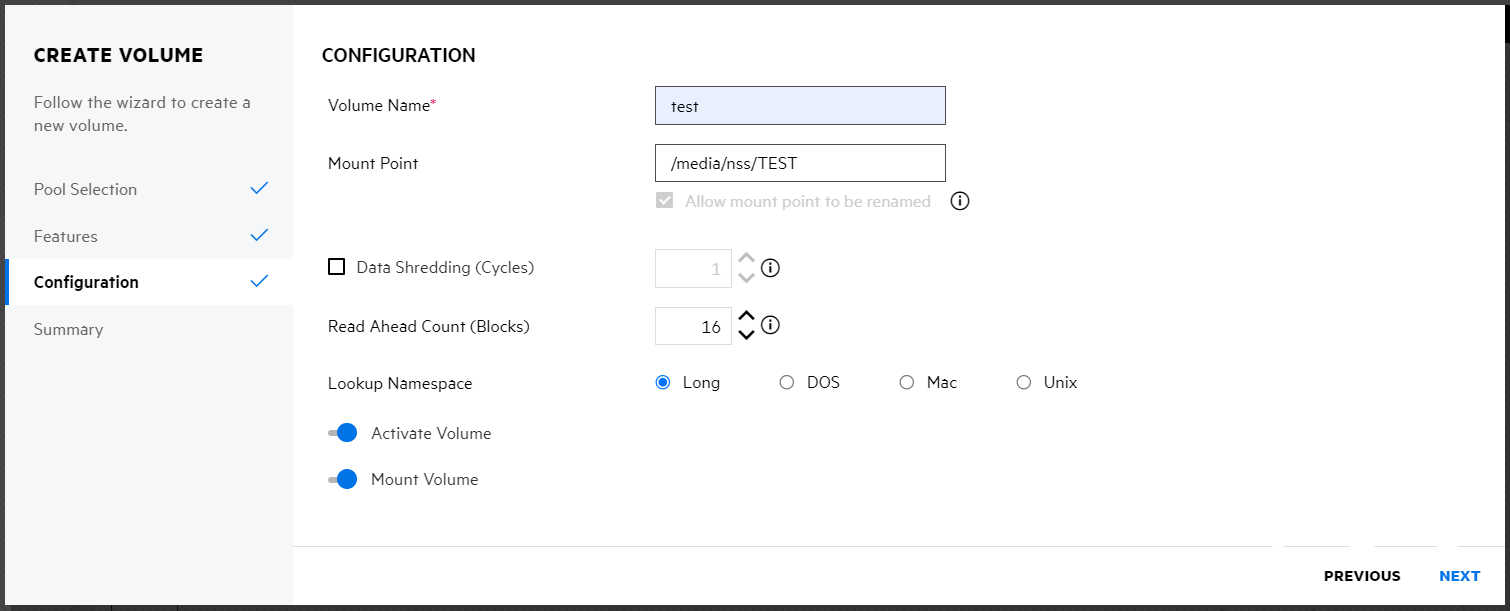
On the CONFIGURATION page, specify a name for the new volume, and click NEXT.
Enable Allow mount point to be renamed to allow updates to the volume name or its path.

-
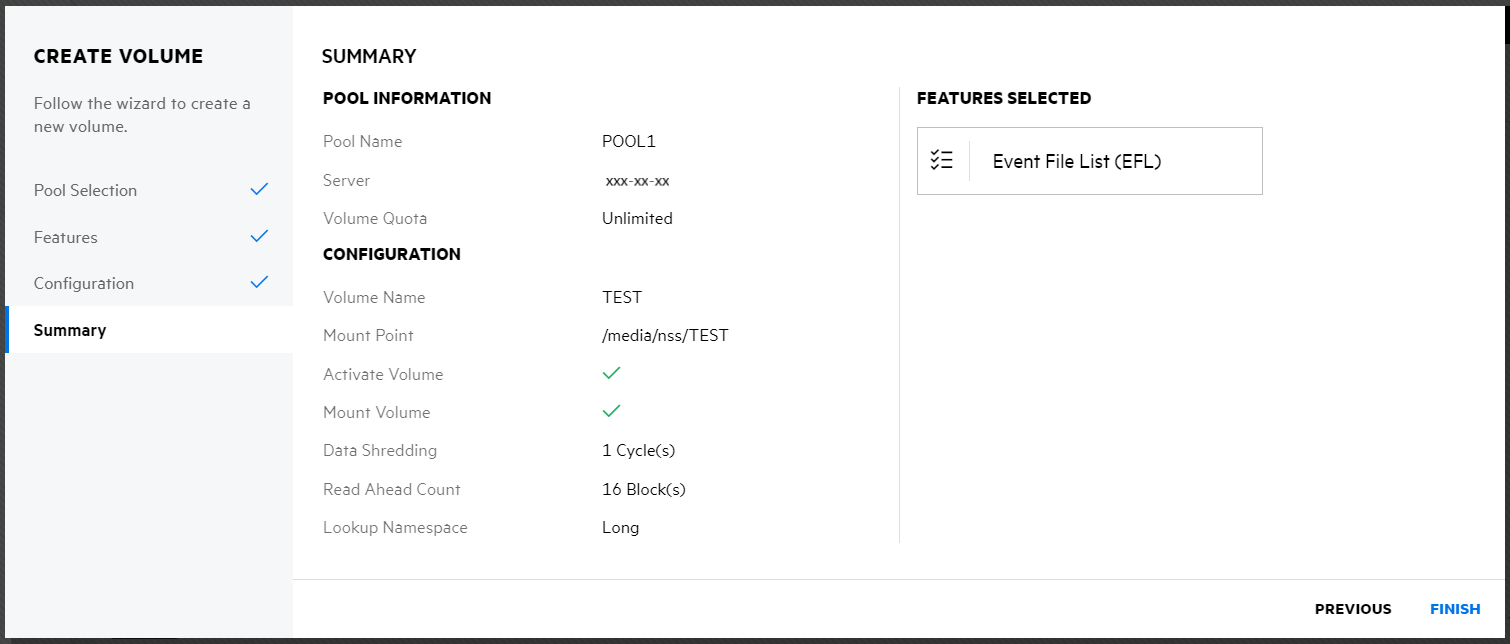
Review the details and click FINISH.

The new volume is available on the VOLUMES page.