4.6 Managing Driver Stores
To look at the information on the existing driver stores:
-
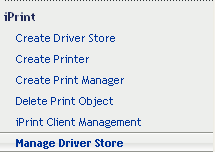
In iManager, click iPrint > Manage Driver Store.

-
Use the Driver Store Control tab to make changes in the driver functionality as needed:
-
Use the Driver Store Control panel to start up or shut down the driver store, copy the printer drivers in this driver store to another driver store, move the Driver Store configuration files and printer drivers to a different server, and view the status of the driver store (Active, Down, Initializing, or Shutting Down).
-
Use the Identification panel to view and add information related to the Driver Store, such as the Driver Store name, version, the network address where the Driver Store is running on, the list of iPrint Manager Customers using your Driver Store, the physical location of the server that the Driver Store is loaded on, and any extra information that you might want to note about your driver store.
-
-
Use the Access Control tab to view and modify the list of resources that have been the assigned manager roles for your driver store:
-
View the list of the existing Driver Store Manager role objects in the Manager Role panel.
-
Click Add to add a new Driver Store Manager object.
-
To delete a Driver Store Manager object, select an object from the Manager Role panel, then click Delete.

-
-
Use the Drivers tab to create and maintain Printer Drivers.
-
Click OK to save your changes.
or
Click Cancel to exit without saving your changes
-
Click Refresh to display the changes you just made.