5.4 Upgrading OES
NOTE:If the OES Cluster Service (NCS) and Business Continuity Clustering (BCC) are configured on the node that is getting upgraded, stop the service before proceeding with Upgrade. See Upgrading the OES cluster node.
NOTE:Upgrade to OES 23.4 fails in a SUSE Xen environment. This issue is fixed with the latest ISO. Download the ISO before performing an upgrade.
Use the following instructions to complete the upgrade applicable to the installation source you are using:
-
Section 5.4.4, Specifying Customer Center Configuration Settings
-
Section 5.4.5, Specifying the Add-On Product Installation Information
-
Section 5.4.6, Verifying and Customizing the Update Options in Installation Settings
-
Section 5.4.9, Participating in Product Improvement Consent Screen
-
Section 5.4.11, Migrating Clustered Linux Volume Resource from clvmd to lvmlockd
5.4.1 Using Physical Media to Upgrade
-
Ensure that the server meets the upgrade requirements. See Meeting the Upgrade Requirements.
-
Insert the OES 23.4 Install Media into the DVD drive of the server that you are upgrading to OES 23.4, then reboot the machine.
-
From the DVD boot menu, select Upgrade, then press Enter.
For upgrading in text mode, from the DVD boot menu, select Upgrade, press F3, select Text Mode, then press Enter.
-
Select the language that you want to use, agree to the license terms, then click Next.
-
On the Network Settings page, click Next.
-
Follow the prompts, using the information contained in the following sections:
-
Verify that the upgrade was successful. See the procedures in Verifying that the Installation was Successful.
-
Complete the server setup by following the procedures in Completing OES Installation Tasks.
5.4.2 Specifying the Partition to Update
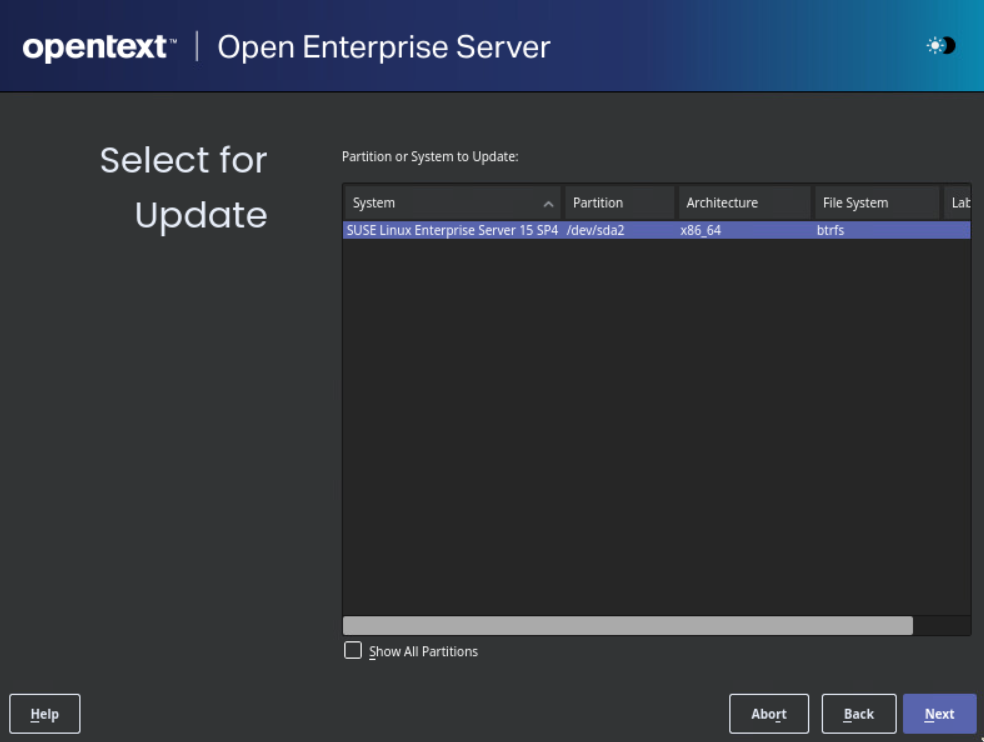
YaST tries to determine the correct root (/) partition. If there are several possibilities, or if YaST can’t definitely determine the correct root partition, the Select for Update page displays.
-
If there is only one partition listed, click Next.
-
If there are several partitions, select the root partition you want to upgrade.
-
Click Next.
YaST mounts the selected partition and displays all repositories that have been found on the partition that you want to upgrade.
5.4.3 Reviewing the Previously Used Repositories
On the Previously Used Repositories page, all the previous OES and SLES repositories are marked for removal. Review and click Next.
5.4.4 Specifying Customer Center Configuration Settings
To receive support and updates for your OES server, you need to register it in the Customer Center. When the Customer Center Configuration page is displayed, you have two options:
Ensure to configure the network settings using the Network Configuration... button on the top right corner of the Customer Center Configuration page before proceeding with registration.
Registering the Server Later
-
Click Configure Later.
-
Click Next.
Registering the Server During the Upgrade
NOTE:Registering an OES server updates it to the latest OES version.
-
On the Customer Center Configuration page, select all of the following options, then click Next.
Option
What it Does
Configure Now
Proceeds with registering this server and the OES product in the Customer Center.
Hardware Profile
Sends information to the Customer Center about the hardware that you are installing OES on.
Optional Information
Sends optional information to the Customer Center for your registration. For this release, this option doesn’t send any additional information.
Registration Code
Makes the registration with activation codes mandatory.
Regularly Synchronize with the Customer Center
Keeps the installation sources for this server valid. It does not remove any installation sources that were manually added.
-
After you click Next, the Contacting server message is displayed. Wait until this message disappears and the Manual Interaction Required page displays.
-
On the Manual Interaction Required page, note the information that you will be required to specify, then click Continue.
-
On the Customer Center Registration page, specify the required information in the following fields, then click Submit:
-
Email Address: The email address for your Login account.
-
Confirm Email Address: The same email address for your Login account
-
Activation Code for OES Components (optional): Specify your purchased or 60-day evaluation registration code for the OES product.
If you don’t specify a code, the server cannot receive any updates or patches.
-
System Name or Description (optional): The hostname for the system is specified by default.
If you want to change this to a description, for the Customer Center, specify a description to identify this server.
-
-
When the message to complete the registration displays, click Continue.
-
After you click Continue, the Contacting server.. message is displayed with the Manual Interaction Required page. Wait until this message disappears and the Customer Center Configuration page displays with the message: Your configuration was successful.
-
When you see the message Your configuration was successful on the dialog box, click Ok.
-
Click Next.
-
Continue with Specifying the Add-On Product Installation Information.
5.4.5 Specifying the Add-On Product Installation Information
On the Add-On Product Installation page, you can add the add-on products you want that are supported on OES 23.4.
If you do not want to add any add-on products with OES 23.4, click Next to continue with Verifying and Customizing the Update Options in Installation Settings.
5.4.6 Verifying and Customizing the Update Options in Installation Settings
IMPORTANT:To verify that previously installed services are selected for installation and to install any additional OES services during the upgrade, you must customize the Update Options on the Installation Settings page.
To verify or customize the software packages that are installed on the server:
-
On the Installation Settings page, click on Packages.
-
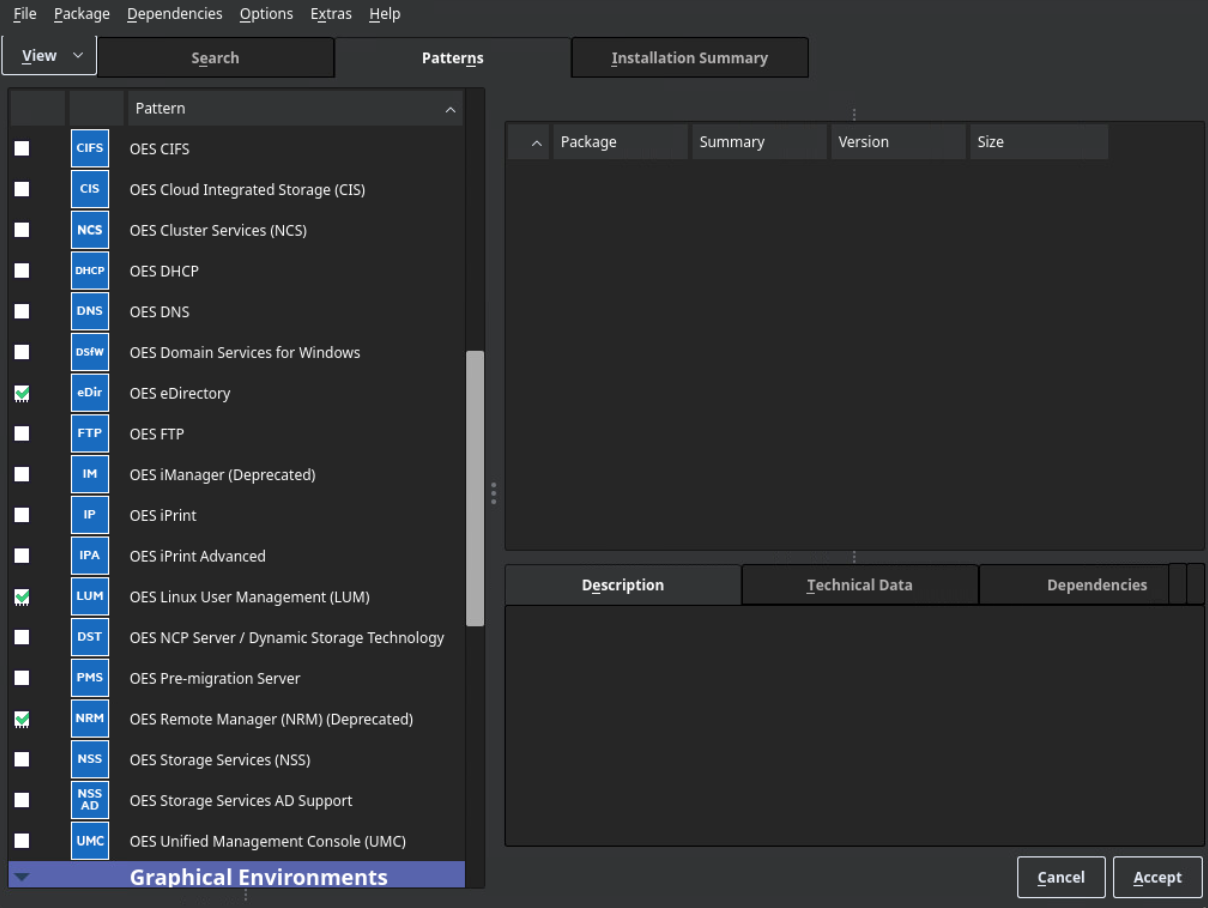
All of the OES Services patterns that were previously installed are selected by default.
Ensure that the patterns for the services you are upgrading are selected, then select the patterns for any new OES Services that you might want to also install.
A description displays to the right of a pattern when the pattern is selected. For a description of OES Services patterns and the components selected with each pattern, see Table 2-4.
IMPORTANT:If you deselect a pattern after selecting it, you are instructing the installation program to not install that pattern and all of its dependent patterns. Rather than deselecting a pattern, click Cancel to cancel your software selections, then click the Select Patterns heading again to choose your selections again.
Selecting only the patterns that you want to install ensures that the patterns and their dependent patterns and packages are installed.
If you click Accept and then return to software pattern selection page, the selections that you made become your base selections and must be deselected if you want to remove them from the installation proposal.
Attempting to uninstall a service by deselecting its pattern is not recommended. For more information, see Section 13.0, Disabling OES Services.
Selecting a pattern automatically selects the other patterns that it depends on to complete the installation.
-
If you want to see the details of your selections, click Details....
-
When you have the software components selected that you want to install, click Accept.
-
When the notification about deleting unmaintained packages appears, click OK.
-
(Conditional) If the prompt for Automatic Changes displays, click Continue.
-
(Conditional) If you are prompted to resolve any dependency conflicts, resolve them.
-
If the Update Options page displays again, click OK.
-
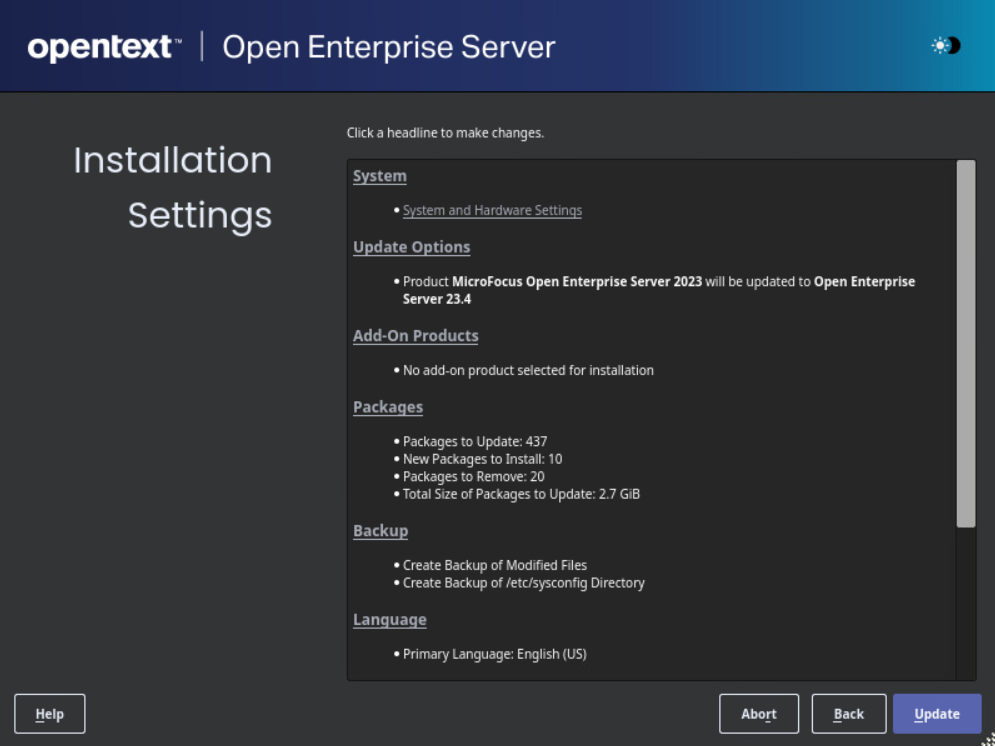
On the Installation Settings page, ensure the following are listed under the Update Options:
Product Open Enterprise Server <earlier version number> will be updated to Open Enterprise Server 23.4
Proceed with Section 5.4.7, Accepting the Installation Settings.
-
If you see package conflict errors (red text under the Packages link), refer to the OES 23.4: Release Notes for resolution instructions.
-
Continue with Accepting the Installation Settings.
5.4.7 Accepting the Installation Settings
-
Review the final Installation Settings page to ensure that you have all the Installation settings you desire. Ensure that the page shows all the OES Services that you want to update and install.
-
After you have changed all the installation settings as desired, click Update.
-
In the Confirm Update dialog box, click Start Update.
The base installation settings are applied and the packages are installed.
-
After the server reboots, continue with Specifying Configuration Information.
5.4.8 Specifying Configuration Information
When the server reboots, you are required to complete the following configuration information:
Upgrading eDirectory
|
OES Version |
eDirectory Version |
|---|---|
|
OES 23.4, OES 24.1 |
9.2.8 |
|
OES 24.2, OES 24.3 |
9.2.9 |
-
When the following dialog box appears, click Upgrade.

NOTE:If you are upgrading from OES 2018 SP3, this dialog will show that the OES 2018 eDirectory database (DIB) and config file were found.
-
On the eDirectory Upgrade - Existing Server Information page, type the Admin password, then click Next.
-
On the Novell Modular Authentication Service page, click Next.
-
Continue with Specifying LDAP Configuration Settings.
Specifying LDAP Configuration Settings
Many of the OES services require eDirectory. If eDirectory was not selected as a product to upgrade or install but other OES services that do require LDAP services were installed, the LDAP Configuration service displays so that you can complete the required information.
-
In the eDirectory Tree Name field, specify the name for the existing eDirectory tree that you are installing this server into.
-
In the Admin Name and Context field, specify the name and context for user Admin on the existing tree.
-
In the Admin Password Name field, specify a password for user Admin on the existing tree.
-
Add the LDAP servers that you want the services on this server to use. The servers that you add should hold the master or a read/write replica of eDirectory. Do the following for each server you want to add:
-
When all the LDAP servers that you want to specify are listed, click Next.
-
Continue with Configuring Open Enterprise Server Services.
Configuring Open Enterprise Server Services
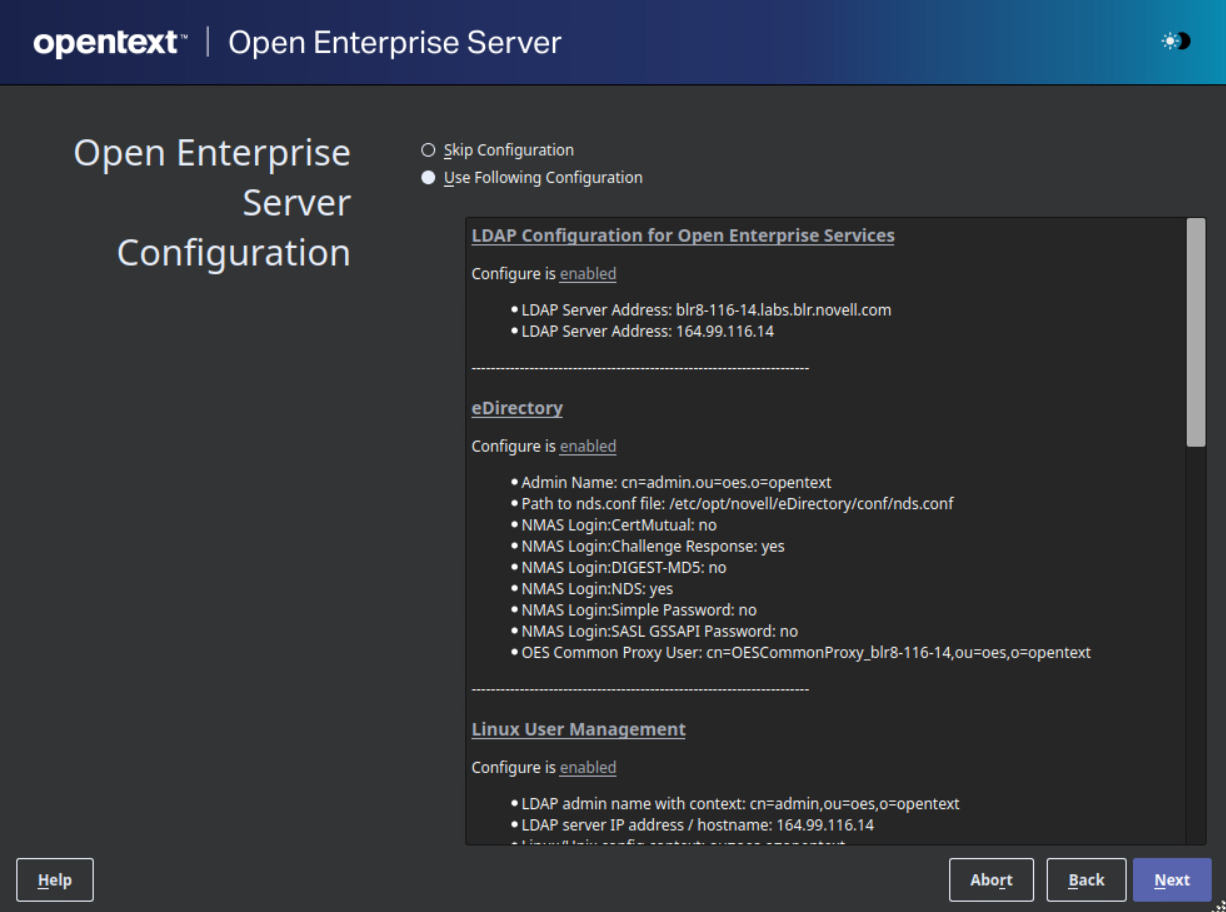
After you complete the LDAP configuration or eDirectory configuration, the Open Enterprise Server Configuration summary page is displayed, showing all the OES components you updated and installed and their configuration settings.
-
Review the setting for each component and click the component heading to change any settings.
When you specify the configuration information for OES services, see the information in Configuration Guidelines for OES Services, or click a link below:
-
When you are satisfied with the settings for each component, click Next.
-
When you confirm the OES component configurations, you might receive the following error:
The proposal contains an error that must be resolved before continuing.
If this error is displayed, check the summary list of configured products for any messages immediately below each product heading. These messages indicate products or services that need to be configured. If you are running the YaST graphical interface, the messages are red text. If you are using the YaST text-based interface, they are not red.
For example, if you selected Linux User Management in connection with other OES products or services, you might see a message similar to the following:
Linux User Management needs to be configured before you can continue or disable the configuration.
If you see a message like this, do the following:
-
On the summary page, click the heading for the component.
-
Supply the missing information in each configuration page.
When you specify the configuration information for OES services during the upgrade, see the information in Configuration Guidelines for OES Services.
When you have finished the configuration of that component, you are returned to the Novell Open Enterprise Server Configuration summary page.
-
If you want to skip the configuration of a specific component and configure it later, click Enabled in the Configuration is enabled status to change the status to Configuration is disabled.
If you change the status to Configuration is disabled, you must configure the OES components after the installation is complete. See Installing or Configuring OES Services on an Existing OES Server.
-
-
After resolving all product configuration problems, click Next to proceed with the configuration of all services and installation of iManager plug-ins.
-
When the Readme page displays, click Next and continue with Section 5.4.10, Finishing the Upgrade.
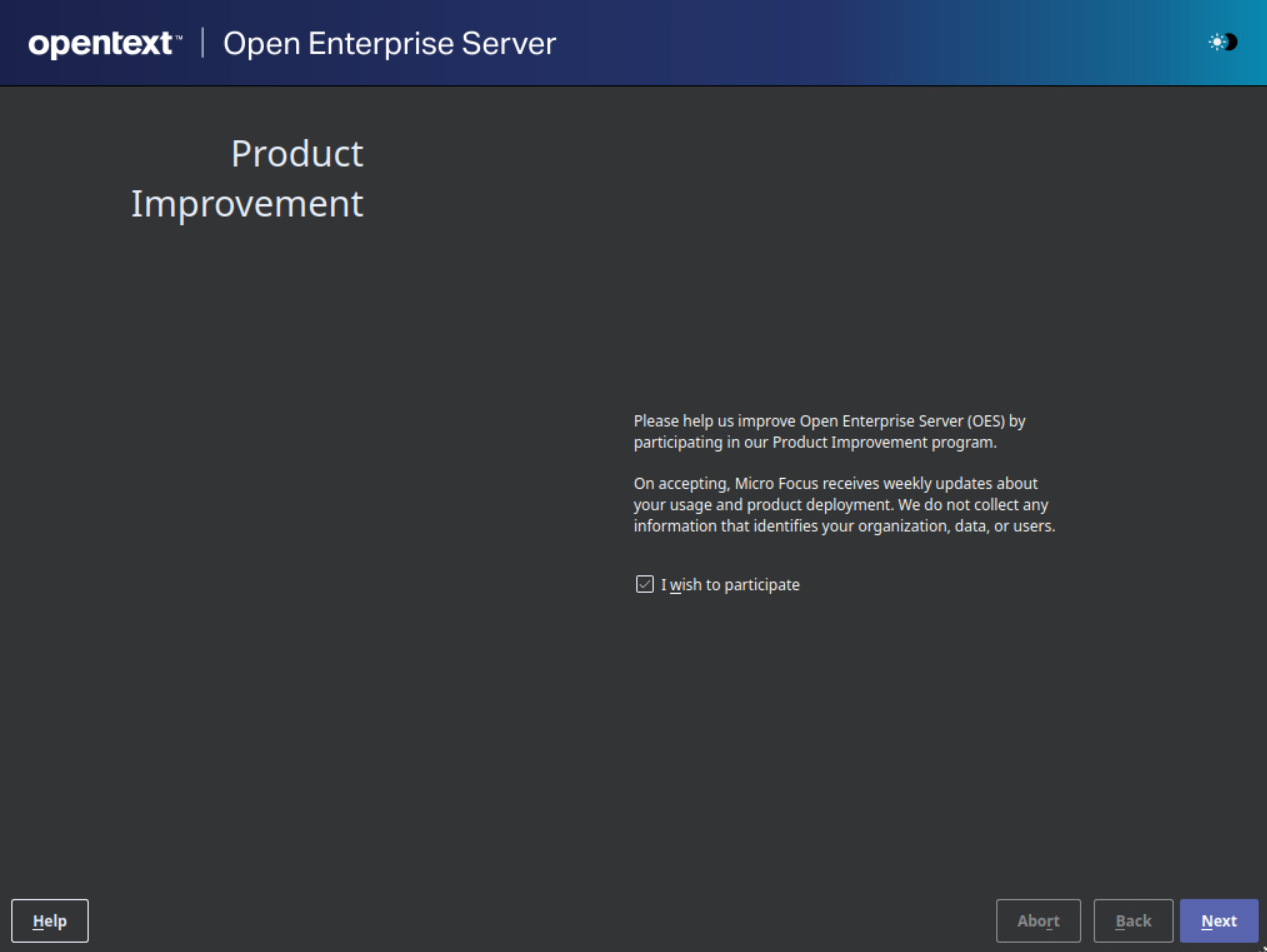
5.4.9 Participating in Product Improvement Consent Screen
Telemetry enables to collect statistical data about your usage of services on the OES server. This data enables us to ensure that you have the best possible experience with OES services. Weekly once the data is sent to the Micro Focus server.
Select the checkbox to participate in the program. All the servers in the same context as this server are automatically enabled for telemetry and this screen is not displayed to other servers in that context.
Figure 5-1 Product Improvement
How the Micro Focus Server Receives the Data
After the weekly collection, the data is stored at /var/opt/novell/telemetry/data/ on the OES server that was configured with this program. The OES server transfers the data to the Micro Focus server. If the transfer is unsuccessful, the system attempts to send it again during the next weekly cycle. No attempts to send the data is made outside of the weekly cycles.
The data is not encrypted because no sensitive or identifying information is included.
5.4.10 Finishing the Upgrade
After a successful configuration, YaST shows the Installation Completed page.
-
Deselect Clone This System for AutoYaST. Cloning is selected by default.
This increases the speed of finishing the installation update.
AutoYaST is a system for automatically installing one or more SUSE Linux Enterprise systems without user intervention. Although you can create a profile from a system that has been upgraded, it does not work to upgrade a similar system.
-
Finish the upgrade by clicking Finish on the Installation Completed page.
5.4.11 Migrating Clustered Linux Volume Resource from clvmd to lvmlockd
Beginning with OES 23.4, clustered Linux volume (LV) uses the lvmlockd instead of clvmd as it is deprecated.
Without performing the following step, if the clustered linux volume is migrated to OES 23.4 the clustered Linux volume resources will go to comatose state.
Migrating clustered Linux volume resource from clvmd to lvmlockd consists of the following steps:
-
Changing the clvmd resource to local resource.
-
Changing the clustered Linux volume to use lvmlockd from clvmd.
NOTE:After performing the above steps, if the clustered Linux volume is migrated to previous OES version node, then the clustered Linux volume resources will go to comatose state.
Changing clvmd Resource to Local Resource
You must perform the following steps on a node where cluster resource is running:
-
Ensure the clvmd resource is not running on any node. For more information, see Onlining and Offlining (Loading and Unloading) Cluster Resources from a Cluster Node.
-
Change the clustered volume group (VG) to a local VG.
vgchange -cn <vgname>
Changing Clustered Linux Volume to use lvmlockd from clvmd
-
Ensure the clvmd or clustered VG to a local VG.
vgchange --lock-type none --lock-opt force <vgname>
CAUTION:This command is only safe if all the nodes have stopped using the VG.
-
Deactivate the logical volume on OES 23.4 server.
lvchange -an <lvname/vgname>
-
Change a local VG to a shared VG.
vgchange --config "global/use_lvmlockd=1" --locktype sanlock --lockopt skipgl <vgname>
If this command succeeds, go to Step 6.
-
If Step 3 fails with an error "Volume group "VGNAME" has insufficient free space (0 extents): 64 required" then complete the following:
-
Activate the logical volume.
lvchange -ay <lvname/vgname>
-
Resize the volume using lvreduce command.
Example: lvreduce --resizefs -L <new volume size> <vgname>
-
Deactivate the logical volume.
lvchange -an <lvname/vgname>
-
-
Repeat Step 3 if you have executed Step 4.
-
Update the load and unload script for the clustered resource.
-
Add the following command in cluster load script before activating the volume group:
ignore_error vgchange --lock-start $VOLGROUP_NAME
Example
# activate lvm-lock on volume
ignore_error vgchange --lock-start $VOLGROUP_NAME
# activate the volume group
exit_on_error vgchange -a ey $VOLGROUP_NAME
-
Add the following command in cluster unload script after deactivating the volume group:
ignore_error vgchange --lock-stop $VOLGROUP_NAME
Example
# deactivate the volume group
exit_on_error vgchange -a en $VOLGROUP_NAME # deactivate lock on volumes
ignore_error vgchange --lock-stop $VOLGROUP_NAME
-
-
Make the cluster resource available on the OES 23.4 server.
cluster online <resource name>