4.11 How to rename a pool?
The option on the page allows you to modify the name of a pool. You can change the name of a pool that corresponds to a department name change. When you rename a pool, it must be in the active state so that the eDirectory gets updated.
-
In UMC, click
 > .
> . -
Search or browse the servers to list the pools associated with them.
-
Select the pool, click More Options
 icon, click , and then select .
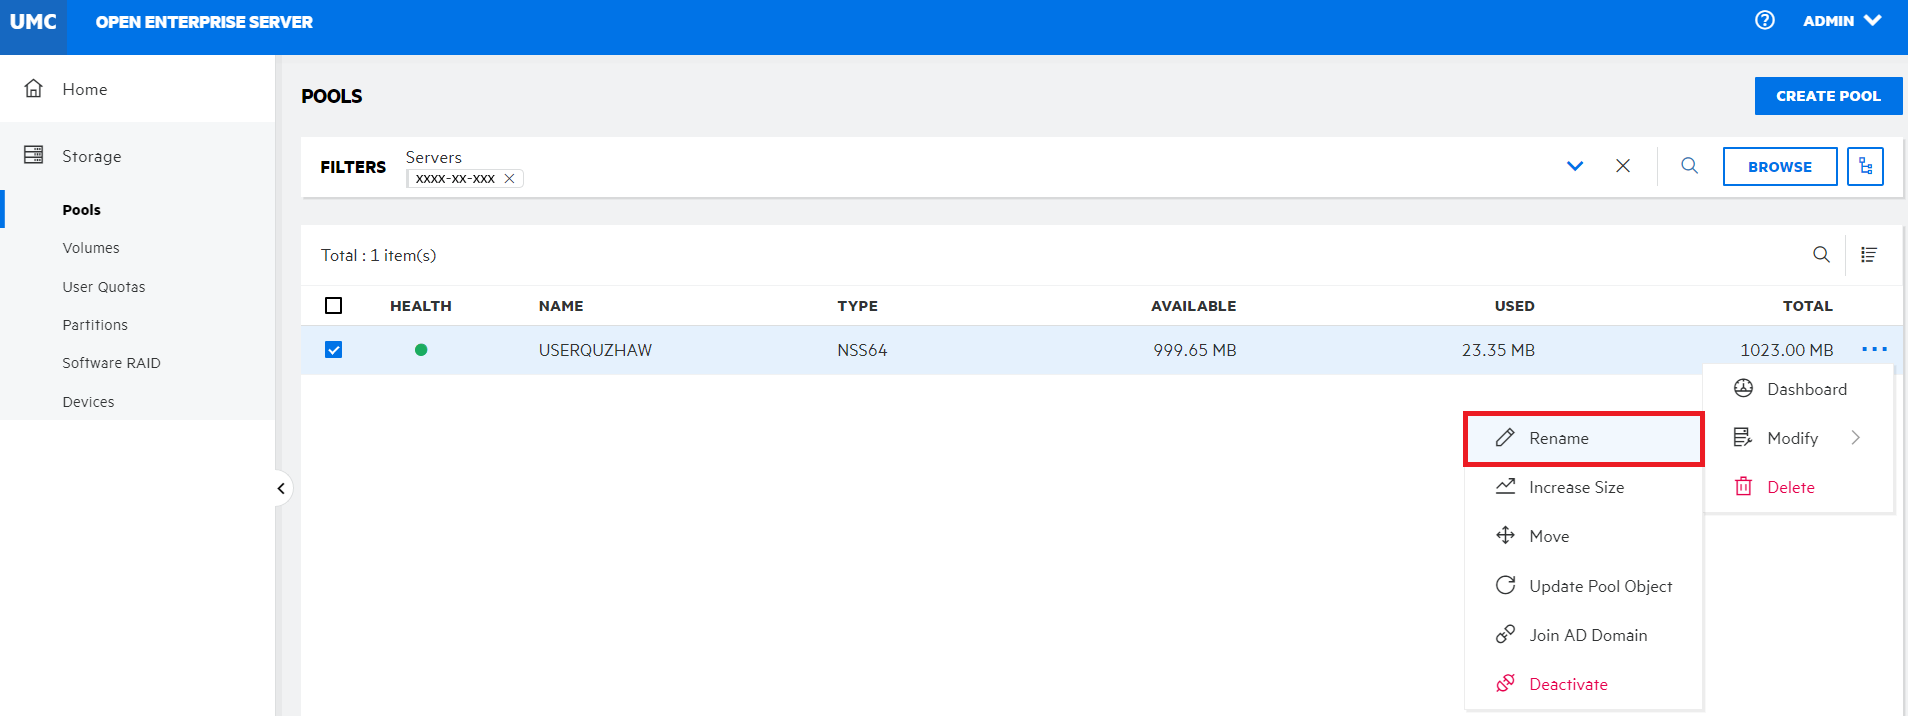
-
Specify the new pool name and click .
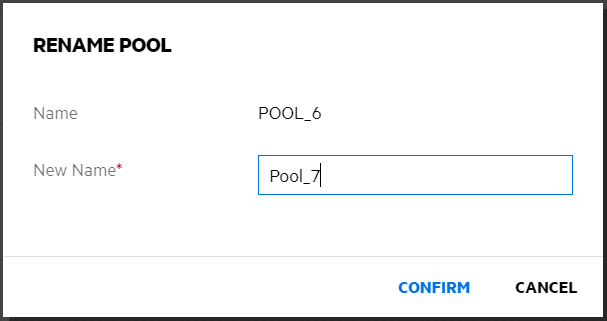
Table 4-1 Actions Required After Renaming a Pool
|
Pool ShareState |
Pool Load-Time State |
Pool State After a Rename |
Action Required |
|---|---|---|---|
|
Unshared |
Autoloaded |
Active with volumes dismounted |
Mount the pool’s volumes |
|
Unshared |
Not autoloaded |
Deactive |
Activate the pool, then mount its volumes |
|
Shared |
Load and unload are controlled by OES Cluster Services. Before you rename a cluster-enabled pool, make sure to offline the pool resource, activate the pool by using UMC or NSSMU instead of using the load script, then you can rename the pool by using UMC or NSSMU. |
Deactive |
Online the pool resource to activate the pool and its volumes. OES Cluster Services automatically updates the pool resource load and unload scripts to reflect the name change. Also, NSS automatically changes the Pool Resource object name in eDirectory. |