Specifying the Properties
The Eclipse function package provides comprehensive support for the properties of an Eclipse resource. The properties are available to you as linked properties. To add a linked property to the model right-click the Properties category folder, and then click and choose one of the resources available. In this tutorial you only need to add the resource properties Name and Has Children:
- Right-click the
Properties category folder, and then click
.
This opens the Enter Object ID dialog box.
- In the New ID file, type TUTORIAL_PROP_EclipseResName.
- Click OK.
- Right-click the
Properties category folder, and then click
.
This opens the Enter Object ID dialog box.
- In the New ID filed, type TUTORIAL_PROP_ResHasChildren.
- Click OK.
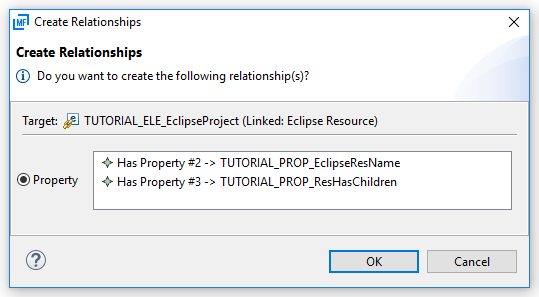
- While pressing Ctrl, click TUTORIAL_PROP_EclipseResName and TUTORIAL_PROP_ResHasChildren
- Drag and drop the selection onto
TUTORIAL_ELE_EclipseProject.
This opens the Create Relationships dialog box.

- Click OK.
- Repeat steps 7 through 9 twice, replacing the target of the drag and drop action with TUTORIAL_ELE_EclipseFolder on the first occasion and TUTORIAL_ELE_EclipseFile on the second.
- You now need to create four more properties:
Right-click the Properties category folder, and then click .
This opens the Enter Object ID dialog box.
- In the New ID field, type TUTORIAL_PROP_EleType.
- Click OK.
- Create three more properties, repeat steps 11 through 13 replacing the
New ID filed with the following names:
- TUTORIAL_PROP_ProjectNature
- TUTORIAL_PROP_ResourceFilter
- TUTORIAL_PROP_NewName
Note: All four properties are of type String.For each of the properties you have just created specify a meaningful Label value. During runtime the Label value is used, for example, as a title in the Table Results view or as a label in an AWM dialog box. For example:
Property Label TUTORIAL_PROP_EleType Label Type TUTORIAL_PROP_ProjectNature Project Nature TUTORIAL_PROP_ResourceFilter Filter TUTORIAL_PROP_NewName New Name - Right-click
TUTORIAL_PROP_EleType, and then click
Edit.
This opens the Edit Properties dialog box.
- Double-click the Label value cell, and then type the label name of your choice.
- Click OK.
- Repeat steps 15 through 17 for the following properties adding a suitable label name of your choice each time:
- TUTORIAL_PROP_ProjectNature
- TUTORIAL_PROP_ResourceFilter
- TUTORIAL_PROP_NewName
Note: You must always specify one property in your model which is used to return the match name specifying which element type it is. This is specified by the property Special Property, and in this case, it will have an Element_Type value: - Right-click
TUTORIAL_PROP_EleType, and then click
Edit.
This opens the Edit Properties dialog box.
- Double-click the Special Property value cell, and then click Element_Type.
- Click OK.
- Right-click
TUTORIAL_PROP_NewName, and then click
Edit.
This opens the Edit Properties dialog box.
- Double-click the Label value cell, and then type New Name.
- Click OK.