Tutorial: AppMaster Builder
Assumptions
This tutorial is written from the perspective that all of the following is true. Specific instructions for setting your environment to adhere to these assumptions is found in the Before you begin this tutorial section that follows:
- Windows File Explorer is set to show file names and extensions.
- You are running the latest version of Enterprise Developer, which has been installed on your local machine.
- You have installed the latest version of the AppMaster Builder AddPack for Enterprise Developer.
- Eclipse is started on your local machine, and the AMB Perspective is open.
- You are using the default Eclipse workspace, which is c:\users\WinUserName\workspace, where WinUserName is your Windows user name.
- Eclipse options are set to build projects automatically.
- You have addressed all of the items in the Before you begin this tutorial section below.
Before you begin this tutorial
Before beginning this tutorials be sure you have addressed each of the following items:
- Set Windows File Explorer options
- These tutorials assume that your Windows File Explorer options are set to use the Details layout, and to show file name extensions. See your Windows documentation for more information.
- Start Enterprise Developer
- Start
Enterprise Developer using the default workspace, which is
%USERPROFILE%\eclipse-workspace. If you need instructions to get
Enterprise Developer started on your local machine, see
To start
Enterprise Developer.
Note: If Visual Studio prompts you on startup to select an initial action, click Continue without code.
- Open the AppMaster Builder perspective and views in Eclipse
-
- From the Eclipse IDE, click
Open Perspective
 .
.
- On the
Open Perspective dialog box, select
AppMaster Builder, and then click
OK.
The AppMaster Builder perspective includes the Project Explorer and the Database View Explorer views.
- From the Eclipse IDE, click
Open Perspective
- Set Eclipse to build automatically
- By default, the Eclipse
Build Automatically option is turned on, which means that Eclipse builds a project automatically each time a change is made. To ensure that this
Build Automatically is turned on:
- From the Eclipse Main Menu, click Project.
- Do one of the following:
- If the Build Automatically menu option has a check mark to its left, it is already turned on. No further action is required.
- If the Build Automatically menu option does not have a check mark to its left, click the option to turn it on.
- Review Screen Painter basics
- Before you start the Paint a Screen section of this tutorial, review the tools and techniques presented in the Screen Painter Basics topic.
Demonstration application - BLDRAPPL
The demonstration application provided for this tutorial is a basic, online application named BLDRAPPL. It is missing some components that you define in AppMaster Builder.
BLDRAPPL uses CICS/VSAM as the development target because it is commonly used in production.
The BLDRAPPL application performs the following functions:
- Presents a selection menu
- Enables you to add, update, query, and delete records
- Calculates the total value of your inventory
- Provides an exit
The application as shipped includes two programs and associated screens:
- BLDRCMNU program
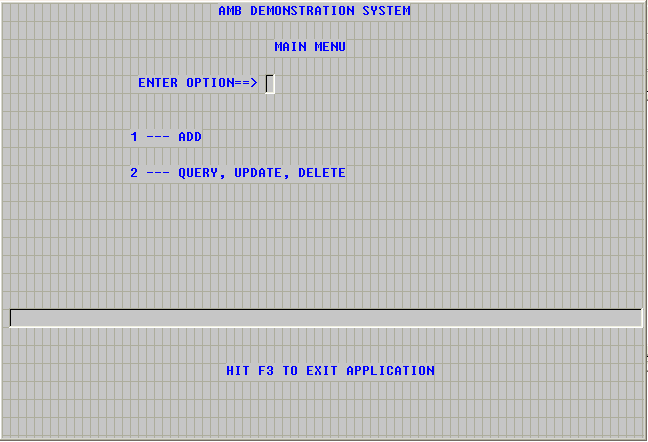
- BLDRCMNU is a menu program that interacts with the BLDRCM screen.
- BLDRCM screen
- Provides access to two program screens, and provides an option to exit the application.

- BLDRCADD program
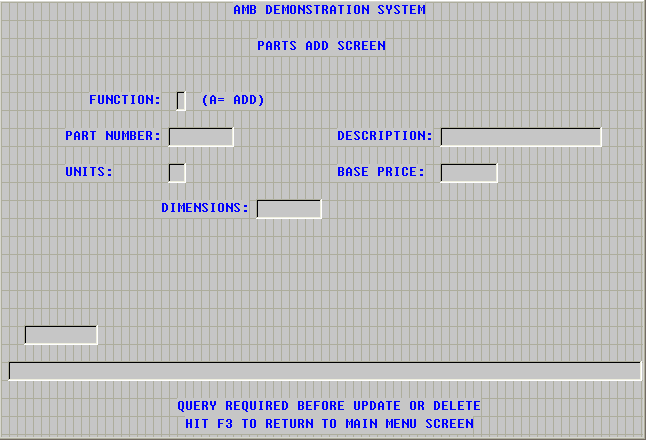
- BLDRCADD interacts with the BLDRCA screen.
- BLDRCA screen
- Enables your end user to add parts information and records to a database, and then return to the main menu.

The BLDRAPPL application also includes one additional program that you create to interact with one additional screen that you also create:
- BLDRUPD program
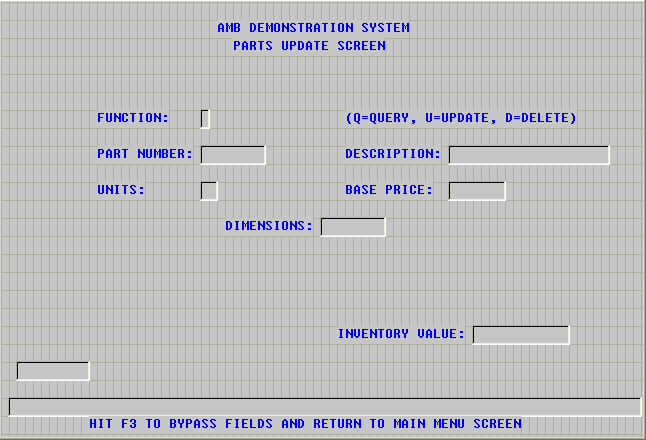
- Interacts with the BLDRCU screen.
- BLDRCU screen
- Enables end users to query, update, and delete multiple part records; keep a running total of inventory value; and exit to the main menu.

Sequence
To complete this tutorial, progress through these topics in the order presented here. The bottom of each topic provides Next topic and Previous topic navigational links to help you proceed in the proper sequence: