Starting the Bastion Instance
- Using the Find Services search tool, locate and browse to the EC2 Dashboard.
- In the left navigation pane, under INSTANCES, click Instances.
- On the Instances management dialog, click Launch Instance to start the wizard.

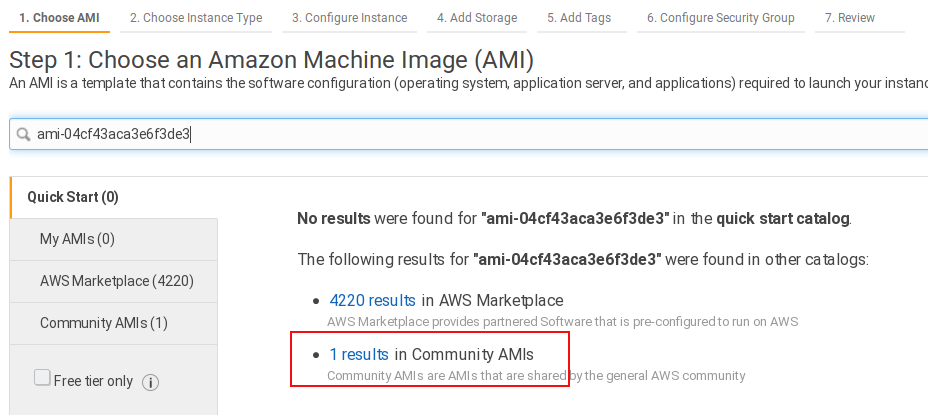
- On the Step 1: Choose an AMI page, in the search box, specify your AMI ID (from your AWS worksheet) and press Enter. The page displays a single result in Community AMIs.

- Click the link for 1 results in Community AMIs. The selected OS is displayed.
- Click Select.

- On the Step 2: Choose an Instance Type page, on the Instance Type list, search for and select your own instance type (use the browser search function if needed). Then, click Next: Configure Instance Details.

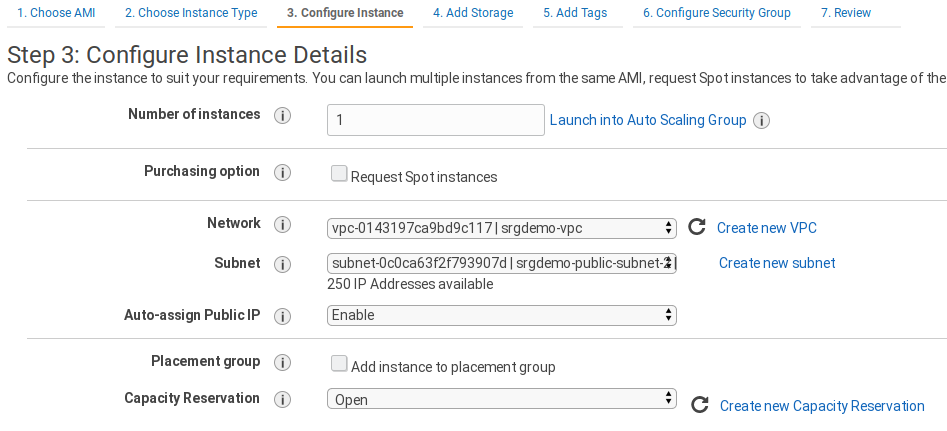
- On the Step 3: Configure Instance Details page, specify these values for the following settings:
- Network: Choose your VPC.
- Subnet: Choose one of your three public subnets.
- Auto-assign Public IP: Enable this value.
- Click Next: Add Storage .

- On the Step 4: Add Storage page, set the root volume size according to your previously-decided needs. In this example, we assume that we will be using it only to upload product images, so we will set it to 20 GB.

- Enable Delete on Termination.
- Click Next: Add Tags.
- On the Step 5: Add Tags page, click Add Tag.
- Specify and save a tag called Name with the value of your bastion name (for example, srgdemo-bastion.)
- Optionally, you can add other tags as needed.
- Click Next: Configure Security Group.

- On the Step 6: Configure Security Group page, under Assign a security group, choose Select an existing security group.
- The list shows all security groups associated with your VPC. Select both the Bastion security group and Intra VPC security group. (Choose by name or ID from your AWS worksheet.)
- Click Review and Launch.

- On the Step 7: Review Instance and Launch page, review all parameters for correctness and fix if necessary. Then click Launch.
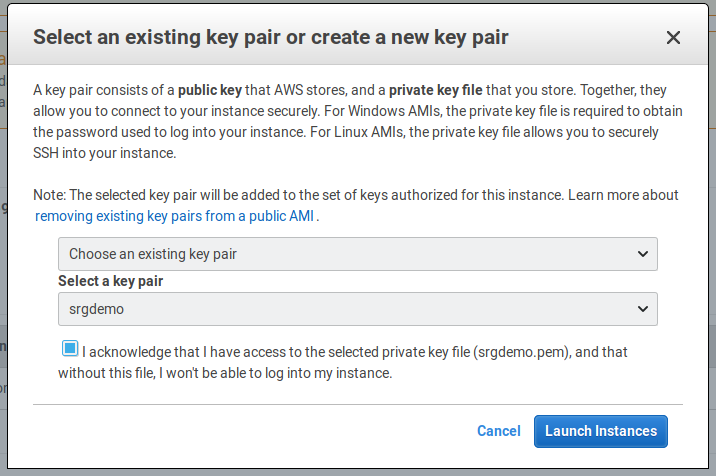
- On the Select an existing key pair... dialog, pick Choose an existing key pair from the drop-down, then select your previously-created key pair.

- Click Launch Instances. The instance is launched and displayed.

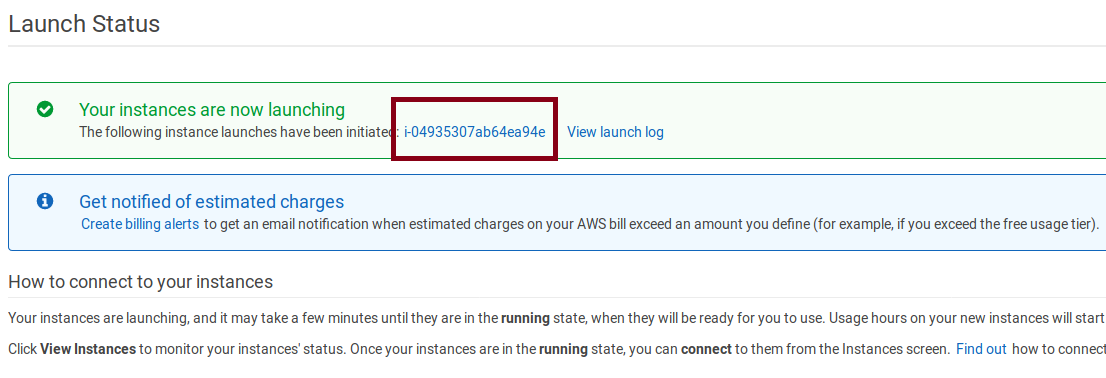
- From on the Launch Status page, from the green box, copy your instance ID to your AWS worksheet under Notes.
- Click View Instances to return to the Instances management page.
- Run the following command:
aws ec2 run-instances \
--image-id <Image Id> --count 1 \
--instance-type <Instance type> \
--key-name <Key pair name> \
--security-group-ids <security group Ids> \
--subnet-id <public subnet Id> \
--block-device-mappings <device mapping parameters> \
--tag-specifications 'ResourceType=instance,Tags=[{Key=Name,Value=<bastion instance name>}]' 'ResourceType=volume,Tags=[{Key=Name,Value=<bastion instance volume name>}]' \
--associate-public-ip-address | jq '.Instances[].InstanceId'
Where:
<Image Id>: Your AMI ID.
<Instance type>: Your bastion type.
<Key pair name>: Name of the key pair previously created in SSH Keypair.
<Security group IDs>: IDs of the two security groups created by your AWS infrastructure administrators. Add both the Bastion Security group Id and Intra VPC Security group ID; separate entries with a single space character.
<public subnet Id>: ID of one of the three public subnets created by your AWS infrastructure administrators.
<Device mapping parameters>: See the example; used for changing root volume size. For more information about parameters and values, please run:aws ec2 run-instances help.
<bastion instance name>: Name assigned to the bastion instance for easier identification.
<bastion instance volume name>: Name for the storage volume attached to the current bastion instance.
Example:
aws ec2 run-instances --image-id ami-04cf43aca3e6f3de3 \
--count 1 --instance-type t2.medium \
--key-name srgdemo --security-group-ids sg-00b5fcc4294d234f6 sg-0ce3c569f73737b77 \
--subnet-id subnet-0c0ca63f2f793907d \
--block-device-mappings "DeviceName=/dev/xvda,Ebs={VolumeSize=70,VolumeType=gp3}" \
--tag-specifications 'ResourceType=instance,Tags=[{Key=Name,Value=srgdemo-bastion}]' 'ResourceType=volume,Tags=[{Key=Name,Value=srgdemo-bastion-volume}]' \
--associate-public-ip-address | jq '.Instances[].InstanceId'
- The command returns an instance ID (for example,
i-06773a3ef6acd24f0). Record your instance ID to the AWS worksheet. - Check the instance status by running the following command:
aws ec2 describe-instances \
--instance-ids <Instance Id> | jq '.Reservations[].Instances[].State'
Example output (JSON):
{
   "Code":16,
   "Name":"running"
}
- Repeat the check until the result shows Name: running. For example:
aws ec2 describe-instances \
--instance-ids i-06773a3ef6acd24f0 | jq '.Reservations[].Instances[].State' - For easier identification of your bastion instance, tag it with a name by running the following command:
aws ec2 create-tags --resources <Instance Id> \
--tags Key=Name,Value=<tag value>
For example:
aws ec2 create-tags \
--resources i-06773a3ef6acd24f0 \
--tag Key=Name,Value=srgdemo-bastion
Next Step: Retrieving the Bastion Public IP