Configuring ArcSight Components to Use the Updated RE External Communication Certificate
After signing the RE External Communication Certificate for a new or upgraded ArcSight installation, you need to configure the Kubernetes pods and the ArcSight Database to use the updated certificate. The sections below provide the instructions to configure those components for the updated certificate. For information about signing the RE certificate, see Securing External Communication with the RE Certificate
-
Configuring ArcSight Kubernetes Pods to Use the Updated RE External Communication Certificate
-
Configuring the ArcSight Database to Use the Updated RE External Communication Certificate
Configuring ArcSight Kubernetes Pods to Use the Updated RE External Communication Certificate
Following this procedure will restart ArcSight Kubernetes pods so that they immediately refresh their trust stores to use an updated RE external communication certificate chain. This will result in temporary downtime of the services these pods provide while the pods are restarting.
-
Restart the following ArcSight pods, so they can use the new RE certificate:
-
Commands for all deployments:
ARCSIGHT_NS=$(kubectl get namespaces --no-headers -o custom-columns=":metadata.name" | grep arcsight-installer)
labels=autopass-lm-apps,soar-web-app,soar-frontend,osp,management,reporting,search-engine,arcmc,web-service,schema-registry,kafka,zookeeper,c2av-stream-processor,enrichment-processor,kafka-manager,c2av-esmprocessor,routing-processor,ceb,searchmanager-engine,interset-api,interset-analytics,intelligence-tuning-api,hdfs-namenode,hdfs-datanode,interset-logstash,arcsightconnector-api
kubectl delete pods -n $ARCSIGHT_NS -l "name in (suite-reconf-sel-arcsight-installer)"
kubectl delete pods -n $ARCSIGHT_NS -l "app in ($labels)"
Some pods may not return to running state after restart due to the certificate change while trying to connect to database. For example,intelligence-tuning-api,interset-analytics, andinterset-api. These pods should return to running state once you update database certificates. -
(Conditional) Command for an on-premises deployment only, after running the commands above:
kubectl delete pod -n core -l "app.kubernetes.io/name in (itom-kube-dashboard)"
-
-
Update the ArcSight Platform's embedded reverse proxy Nginx to use the updated RE external communication certificate chain, based on your type of deployment, on-premises or cloud by running the commands below:
- Change the directory:
For an on-premises deployment, run:
cd /opt/arcsight/kubernetes/scripts/
For a cloud deployment, run:
cd {path to cdf installer}/cdf-deployer/scripts/
-
Run the
cdf-updateREscript:./cdf-updateRE.sh renewPortals
- Change the directory:
- (Conditional) If you deployed the ArcSight Database, update the ArcSight Database to use the updated RE external communication certificate by following the instructions in Configuring the ArcSight Database to Use the Updated RE External Communication Certificate.
Create or Update Route 53 Certificates (AWS Only)
A user-provided self-signed or CA-signed certificate is required for creating the Application Load Balancer (ALB). In this section, you will create a configuration file for the certificate signing request (CSR), create an intermediate certificate pair, sign the CSR, create a chained file for import, then import the self-signed certificate into Amazon Certificate Manager (ACM).
-
Create or update Route 53 certificates:
-
Run the applicable command on a secure machine to generate the Route 53 certificate:
-
For a current version of SSL, run this command:
openssl req -nodes -newkey rsa:2048 -keyout <your.route53dnsRecordsetName>.key.pem -out <your.route53dnsRecordsetName>.csr.pem -subj "/C=US/ST=State/L=City/O=Company Inc./OU=IT/CN=<your.route53dnsRecordsetName>" -addext "subjectAltName = DNS:<your.route53dnsRecordsetName>"
-
If your operating system does not support
-addextfor SSL, run this command:openssl req -newkey rsa:2048 -sha256 -nodes -keyout your.route53dnsRecodsetName.key.pem -out your.route53dnsRecodsetName.csr.pem -subj "/C=US/ST=CA/L=SU/O=MF/OU=IT/CN=<your.route53dnsRecordsetName>" -extensions san -config <(echo '[req]'; echo 'distinguished_name=req';echo 'req_extensions=san';echo '[san]'; echo 'subjectAltName=DNS:your.route53dnsRecodsetName')
your.route53dnsRecordsetNameis your route53 record set name tracked in your AWS configuration worksheet. This command will create the private key file<your.route53dnsRecordsetName>.key.pemand the certificate signing request file<your.route53dnsRecordsetName>.csr.pem. -
-
Copy the certificate signing request
<your.route53dnsRecordsetName>.csr.pemto your bastion or jump host machine. -
Run the following commands to sign the certificate signing request using your cluster RE certificate:
export COMMON_NAME=<your.route53dnsRecordsetName>
export CDF_APISERVER=$(kubectl get pods -n core -o custom-columns=":metadata.name"| grep cdf-apiserver)
export PASSPHRASE=$(kubectl get secret vault-passphrase -n core -o json 2>/dev/null | jq -r '.data.passphrase')
export ENCRYPTED_ROOT_TOKEN=$(kubectl get secret vault-credential -n core -o json 2>/dev/null | jq -r '.data."root.token"')
export VAULT_TOKEN=$(echo ${ENCRYPTED_ROOT_TOKEN} | openssl aes-256-cbc -md sha256 -a -d -pass pass:"${PASSPHRASE}")
export CSR=$(cat ${COMMON_NAME}.csr.pem)
export WRITE_RESPONSE=$(kubectl exec -it -n core ${CDF_APISERVER} -c cdf-apiserver -- bash -c "VAULT_TOKEN=$VAULT_TOKEN vault write -tls-skip-verify -format=json RE/sign/coretech csr=\"${CSR}\"") && \ echo ${WRITE_RESPONSE} | jq -r ".data | .certificate" > ${COMMON_NAME}.signed.crt.pem && \ echo ${WRITE_RESPONSE} | jq -r ".data | if .ca_chain then .ca_chain[] else .issuing_ca end" > ${COMMON_NAME}.ca_chain.pemThe RE signed certificate is in file${COMMON_NAME}.signed.crt.pem. The certificate chain is in file${COMMON_NAME}.ca_chain.pem.
-
-
Import or update the certificate in Amazon Certificate Manager (ACM).
-
Import the self-signed certificate into ACM (for a fresh installation):
-
Log in to the AWS Console.
-
Browse to the Amazon Certificate Manager (ACM).
-
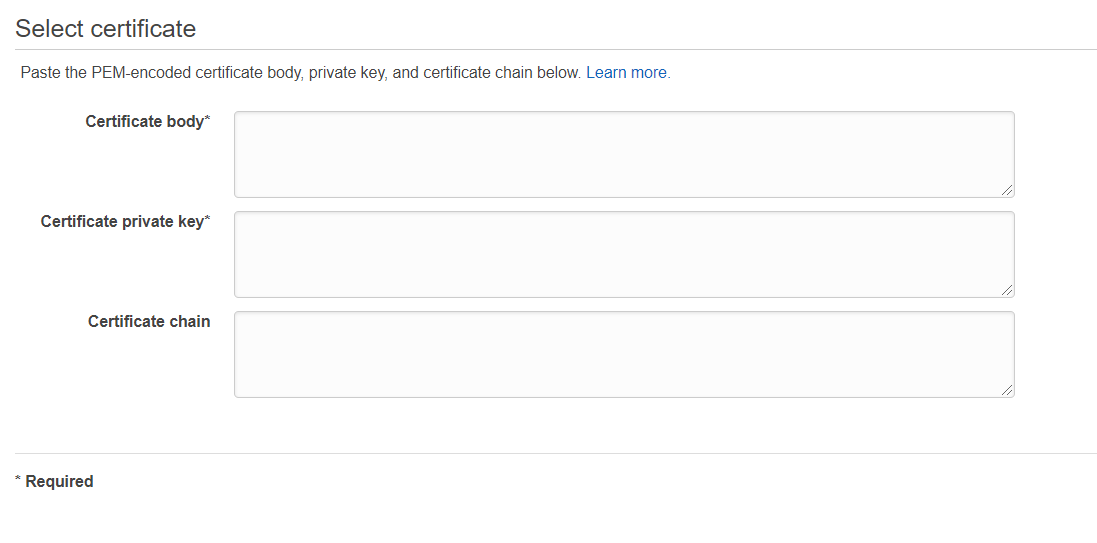
Click Import a certificate, and then complete the fields as follows:
-
Certificate body: Specify the contents of the signed certificate you created earlier. For example,
<your.route53dnsRecordsetName>.crt.pem -
Certificate private key: Specify the contents of the private key created by the CSR request creation. For example,
<your.route53dnsRecordsetName>.key.pem -
Certificate chain: Specify the contents of the chain file. For example,
<your.route53dnsRecordsetName>.ca.pem
-
-
-
To update the certificate in ACM (for a current running installation):
-
Log in to the AWS Console.
-
Browse to the Amazon Certificate Manager (ACM).
-
Search for your certificate Domain name or ID.
-
Select your Certificate ID, and click Reimport.
-
Complete the fields as follows:
-
Certificate body: Specify the contents of the new signed certificate you created earlier. For example,
<your.route53dnsRecordsetName>.crt.pem -
Certificate private key: Specify the new contents of the private key created by the CSR request creation. For example,
<your.route53dnsRecordsetName>.key.pem -
Certificate chain: Specify the new contents of the chain file. For example,
<your.route53dnsRecordsetName>.ca.pem
-
-
For more details, see https://docs.aws.amazon.com/acm/latest/userguide/import-reimport.html
-
-
Click Next. Optionally, add any tags you wish to the import.
-
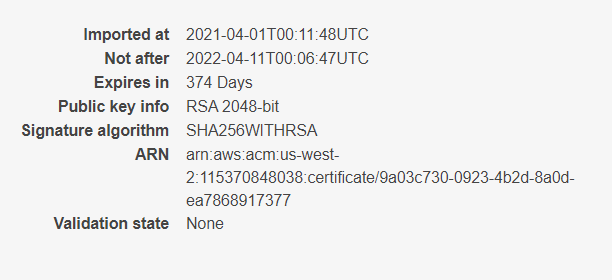
Click Next, and then, click Import.
After the import, click the arrow next to the certificate ARN value. Note the value to your AWS worksheet for later use. For example:
Configuring the ArcSight Database to Use the Updated RE External Communication Certificate
If you deployed the ArcSight Database with your platform, you need to follow these instructions to update the RE External communication certificate.
-
Run these commands on your database node1 to generate the Kafka Scheduler private key file
kafkascheduler.key.pemand the certificate signing request filekafkascheduler.csr.pem:cd <yourOwnCertPath>/
If you installed using the ArcSight Platform Installer, the default location is/opt/arcsight-db-tools/cert/rm -fr kafkascheduler.*.pem issue_ca* *.0
openssl req -nodes -newkey rsa:2048 -keyout kafkascheduler.key.pem -out kafkascheduler.csr.pem -subj "/C=US/ST=State/L=City/O=Company Inc./OU=IT/CN=kafkascheduler"
-
Copy the certificate signing request
kafkascheduler.csr.pemto your cluster or your bastion or jump host. -
Run the following commands on your cluster or your bastion host to sign the certificate signing request using your cluster RE certificate:
export CDF_APISERVER=$(kubectl get pods -n core -o custom-columns=":metadata.name"| grep cdf-apiserver)
export PASSPHRASE=$(kubectl get secret vault-passphrase -n core -o json 2>/dev/null | jq -r '.data.passphrase')
export ENCRYPTED_ROOT_TOKEN=$(kubectl get secret vault-credential -n core -o json 2>/dev/null | jq -r '.data."root.token"')
export VAULT_TOKEN=$(echo ${ENCRYPTED_ROOT_TOKEN} | openssl aes-256-cbc -md sha256 -a -d -pass pass:"${PASSPHRASE}")
export COMMON_NAME=kafkascheduler
export CSR=$(cat ${COMMON_NAME}.csr.pem)
WRITE_RESPONSE=$(kubectl exec -it -n core ${CDF_APISERVER} -c cdf-apiserver -- bash -c "VAULT_TOKEN=$VAULT_TOKEN vault write -tls-skip-verify -format=json RE/sign/coretech csr=\"${CSR}\"") && \ echo "${WRITE_RESPONSE}" | jq -r ".data | .certificate" > ${COMMON_NAME}.crt.pem && \ echo "${WRITE_RESPONSE}" | jq -r ".data | if .ca_chain then .ca_chain[] else .issuing_ca end" > issue_ca.crt -
Copy the RE signed certificate file
kafkascheduler.crt.pemand certificate chain fileissue_ca.crtto database node1<yourOwnCertPath>. -
Update the Database SSL Configuration.
-
If you have not already done so, move the following files to database node1
<yourOwnCertPath>as root:cd <yourOwnCertPath>/ ls <yourOwnCertPath>/
The output should have the following files:
-
generated-db-ca.crt -
generated-db-server.crt -
generated-db-server.key -
generated-db-ca.key -
generated-db-ca.srl -
generated-db-server.csr -
issue_ca.crt -
kafkascheduler.crt.pem -
kafkascheduler.key.pem
If you have not set up the database for SSL mode before and you want to enable SSL now, you may need to generategenerated-db-*.*. To do so, continue with substeps 5. b-c. Otherwise, skip to Step 6. -
-
For chained CAs, run these commands to split the CAs into individual files:
cat issue_ca.crt | awk 'BEGIN {c=0;} /BEGIN CERT/{c++} { print > "issue_ca_part." c ".crt"}'chown -R dbadmin:dbadmin <yourOwnCertPath>
-
(Conditional) If your database is SSL enabled, run the following commands on database node1 to update the database SSL configuration:
cd /opt/arcsight-db-tools
./db_ssl_setup --disable-ssl
NOTE: If the attempt fails, drop the certificate manually by running these commands:
sudo su - dbadmin
vsql -U <dbadminuser> -w <dbadminpassword> -c "ALTER TLS CONFIGURATION server CERTIFICATE NULL;"
vsql -U <dbadminuser> -w <dbadminpassword> -c "DROP CERTIFICATE IF EXISTS server CASCADE;"
-
Enable database SSL for a single issue CA or chained issue CAs:
-
For a single issue CA, run this command:
./db_ssl_setup --enable-ssl --vertica-cert-path <yourOwnCertPath>/generated-db-server.crt --vertica-key-path <yourOwnCertPath>/generated-db-server.key --vertica-ca-path <yourOwnCertPath>/generated-db-ca.crt --client-ca-path <yourOwnCertPath>/issue_ca.crt
-or-
-
For chained issue CAs, run this command, specifying each CA certificate in the chain one by one, separated by a comma in the
client-ca-pathparameter:./db_ssl_setup --enable-ssl --vertica-cert-path <yourOwnCertPath>/generated-db-server.crt --vertica-key-path <yourOwnCertPath>/generated-db-server.key --vertica-ca-path <yourOwnCertPath>/generated-db-ca.crt --client-ca-path <yourOwnCertPath>/issue_ca_part.1.crt, <yourOwnCertPath>/issue_ca_part.2.crt[,...]
-
-
-
-
Update the Kafka Scheduler configuration.
-
On database node1, stop the Kafka Scheduler:
cd /opt/arcsight-db-tools/
./kafka_scheduler stop
-
Run the following command on database node1 to configure the schema registry server setting:
./schema_registry_setup <FQDN of ArcSight Platform Virtual IP for HA or single master node> <yourOwnCertPath>/issue_ca.crt <yourOwnCertPath>/kafkascheduler.crt.pem <yourOwnCertPath>/kafkascheduler.key.pem
- (Conditional) lf the Kafka Scheduler and database are both SSL enabled, update the Kafka Scheduler SSL setup:
On database node1, delete the Kafka Scheduler:
cd /opt/arcsight-db-tools/
./kafka_scheduler delete
On all database nodes, remove the existing Kafka Scheduler SSL configuration.
rm -fr /opt/arcsight-db-tools/ssl_default /opt/arcsight-db-tools/wrk
On database node1, configure the SSL setting for the Kafka Scheduler.
This method uses the crt and key files gathered or generated in earlier steps. The
issue_ca.crtfile should contain all chained CAs. For the Kafka Scheduler to use SSL, run the following command:./sched_ssl_setup --enable-ssl --sched-cert-path <yourOwnCertPath>/kafkascheduler.crt.pem --sched-key-path <yourOwnCertPath>/kafkascheduler.key.pem --vertica-ca-key <yourOwnCertPath>/generated-db-ca.key --vertica-ca-path <yourOwnCertPath>/generated-db-ca.crt --kafka-ca-path <yourOwnCertPath>/issue_ca.crt
Run the following command on database node1 to create the Kafka Scheduler:
./kafka_scheduler create <aks_nodename1>:9093,<aks_nodename2>:9093,<aks_nodename3>:9093
-
-
Start the Kafka Scheduler and checker on database node1:
./kafka_scheduler start
./kafka_scheduler messages
./kafka_scheduler events