Labeling On-premises Worker Nodes
Labeling is a means for identifying application processing and qualifying the application as a candidate to run on a specific node. For example, labeling a node with the label kafka:yes indicates that a Kafka instance will run on that node. The labels tell Kubernetes the types of workloads that can run on a specific host system.
Immediately following deployment of your chosen capabilities, many of their associated pods will remain in a Pending state until you complete the labeling process. For example, the following Transformation Hub pods will be pending: th-kafka, th-zookeeper, th-kafka-manager, th-web-service, and th-schemaregistry.
When you finish labeling the nodes, Kubernetes immediately schedules and starts the label-dependent containers on the labeled nodes. The starting of services might take 15 minutes or more to complete.
Label the Worker Nodes
You must first define the labels that you want to use, then assign them to each node. Labels are case-sensitive and must include the :yes text. To learn which labels apply to your deployed capabilities, see Understanding Labels and Pods.
master:yes and Worker labels are already predefined, and already applied to your nodes based on your installation. You will not need to take any action regarding these labels.- Log in to CDF Management Portal by clicking the link on the Deployment status (Configuration complete) page or browsing to (
https://<ha-address>:5443), where:- Ha-address: represents the FQDN corresponding to the Virtual IP address provided during installation (
--ha-virtual-ip) (or, for a single-master installation, the IP address of the master node). - User Name: admin
- Password: Password that you created the first time that you logged in to the Management Portal.
- Ha-address: represents the FQDN corresponding to the Virtual IP address provided during installation (
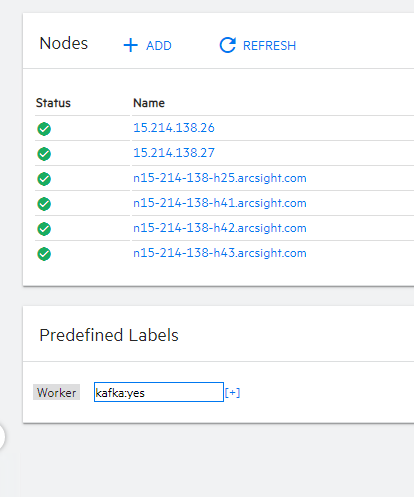
- Go to CLUSTER > Nodes.
- In the text box for Predefined Labels, specify the label to add, then click the + icon.
- Repeat Step 3 for each of the labels that you want to add to the list of predefined labels. Specify the text of the entire label, as shown here, including the
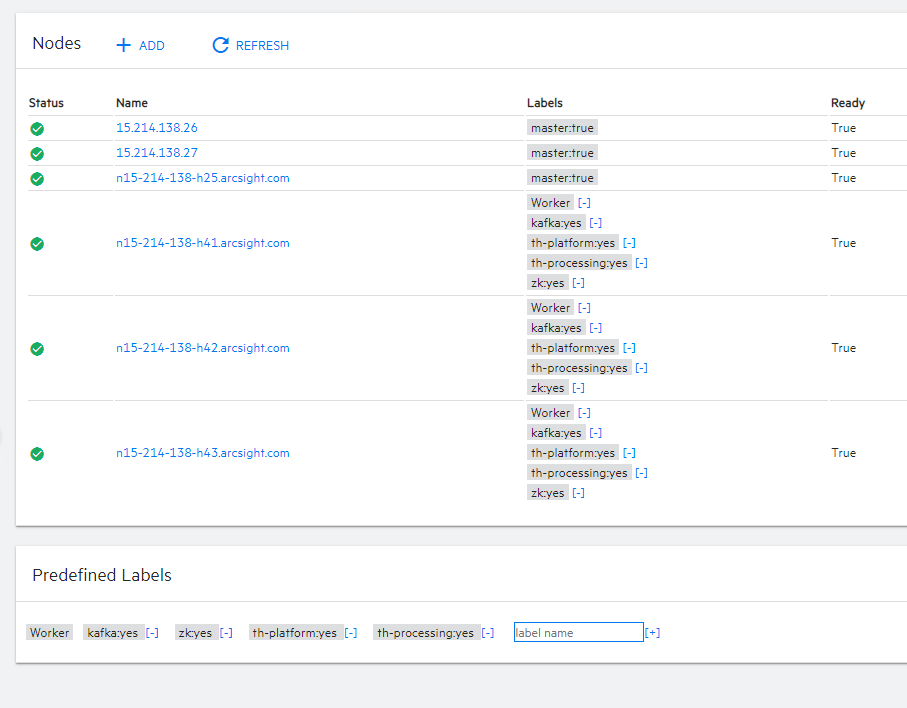
:yestext. - Drag and drop each of the labels that you created to their corresponding worker nodes, based on your workload-sharing configuration. The corresponding components get deployed on the labeled worker nodes.
-
Click Refresh to see the labels that you have applied to the nodes.
After the nodes have been properly labeled, the status of the CDF pods in the Configuration Complete page displays as Running state.
- To monitor the pod start up process, continue to Checking Deployment Status.
- (Conditional) To scale out the cluster, add more worker nodes to it.
For example, for Transformation Hub, create the zk:yes label. As you create the labels, the CDF Management Portal adds them to the Predefined Labels list to the left of the text box.