Creating and Validating the Route 53 Certificate
A user-provided self-signed or CA-signed certificate is required for creating the Application Load Balancer (ALB). In this section, you will create a configuration file for the certificate signing request (CSR), create an intermediate certificate pair, sign the CSR, create a chained file for import, then import the self-signed certificate into Amazon Certificate Manager (ACM).
-
Create or update Route 53 certificates:
-
Run the applicable command on a secure machine to generate the Route 53 certificate:
-
For a current version of SSL, run this command:
openssl req -nodes -newkey rsa:2048 -keyout <your.route53dnsRecordsetName>.key.pem -out <your.route53dnsRecordsetName>.csr.pem -subj "/C=US/ST=State/L=City/O=Company Inc./OU=IT/CN=<your.route53dnsRecordsetName>" -addext "subjectAltName = DNS:<your.route53dnsRecordsetName>"
-
If your operating system does not support
-addextfor SSL, run this command:openssl req -newkey rsa:2048 -sha256 -nodes -keyout your.route53dnsRecodsetName.key.pem -out your.route53dnsRecodsetName.csr.pem -subj "/C=US/ST=CA/L=SU/O=MF/OU=IT/CN=<your.route53dnsRecordsetName>" -extensions san -config <(echo '[req]'; echo 'distinguished_name=req';echo 'req_extensions=san';echo '[san]'; echo 'subjectAltName=DNS:your.route53dnsRecodsetName')
your.route53dnsRecordsetNameis your route53 record set name tracked in your AWS configuration worksheet. This command will create the private key file<your.route53dnsRecordsetName>.key.pemand the certificate signing request file<your.route53dnsRecordsetName>.csr.pem. -
-
Copy the certificate signing request
<your.route53dnsRecordsetName>.csr.pemto your bastion or jump host machine. -
Run the following commands to sign the certificate signing request using your cluster RE certificate:
export COMMON_NAME=<your.route53dnsRecordsetName> export CDF_APISERVER=$(kubectl get pods -n core -o custom-columns=":metadata.name"| grep cdf-apiserver) export PASSPHRASE=$(kubectl get secret vault-passphrase -n core -o json 2>/dev/null | jq -r '.data.passphrase') export ENCRYPTED_ROOT_TOKEN=$(kubectl get secret vault-credential -n core -o json 2>/dev/null | jq -r '.data."root.token"') export VAULT_TOKEN=$(echo ${ENCRYPTED_ROOT_TOKEN} | openssl aes-256-cbc -md sha256 -a -d -pass pass:"${PASSPHRASE}") export CSR=$(cat ${COMMON_NAME}.csr.pem)export WRITE_RESPONSE=$(kubectl exec -it -n core ${CDF_APISERVER} -c cdf-apiserver -- bash -c "VAULT_TOKEN=$VAULT_TOKEN vault write -tls-skip-verify -format=json RE/sign/coretech csr=\"${CSR}\"") && \ echo ${WRITE_RESPONSE} | jq -r ".data | .certificate" > ${COMMON_NAME}.signed.crt.pem && \ echo ${WRITE_RESPONSE} | jq -r ".data | if .ca_chain then .ca_chain[] else .issuing_ca end" > ${COMMON_NAME}.ca_chain.pemThe RE signed certificate is in file${COMMON_NAME}.signed.crt.pem. The certificate chain is in file${COMMON_NAME}.ca_chain.pem.
-
-
Import or update the certificate in Amazon Certificate Manager (ACM).
-
Import the self-signed certificate into ACM (for a fresh installation):
-
Log in to the AWS Console.
-
Browse to the Amazon Certificate Manager (ACM).
-
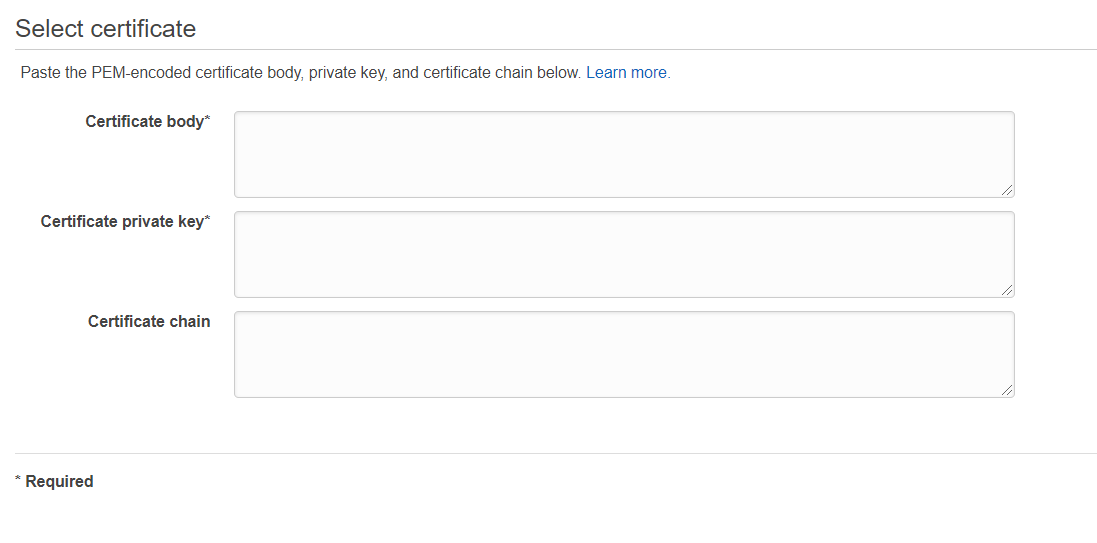
Click Import a certificate, and then complete the fields as follows:
-
Certificate body: Specify the contents of the signed certificate you created earlier. For example,
<your.route53dnsRecordsetName>.crt.pem -
Certificate private key: Specify the contents of the private key created by the CSR request creation. For example,
<your.route53dnsRecordsetName>.key.pem -
Certificate chain: Specify the contents of the chain file. For example,
<your.route53dnsRecordsetName>.ca.pem
-
-
-
To update the certificate in ACM (for a current running installation):
-
Log in to the AWS Console.
-
Browse to the Amazon Certificate Manager (ACM).
-
Search for your certificate Domain name or ID.
-
Select your Certificate ID, and click Reimport.
-
Complete the fields as follows:
-
Certificate body: Specify the contents of the new signed certificate you created earlier. For example,
<your.route53dnsRecordsetName>.crt.pem -
Certificate private key: Specify the new contents of the private key created by the CSR request creation. For example,
<your.route53dnsRecordsetName>.key.pem -
Certificate chain: Specify the new contents of the chain file. For example,
<your.route53dnsRecordsetName>.ca.pem
-
-
For more details, see https://docs.aws.amazon.com/acm/latest/userguide/import-reimport.html
-
-
Click Next. Optionally, add any tags you wish to the import.
-
Click Next, and then, click Import.
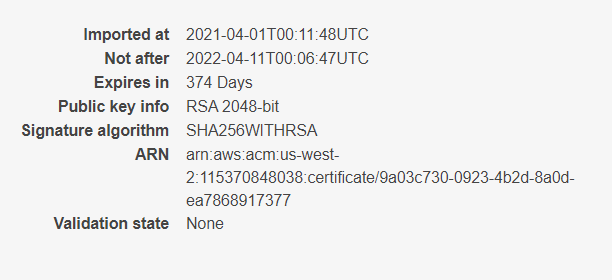
After the import, click the arrow next to the certificate ARN value. Note the value to your AWS worksheet for later use. For example:
Next Step: Configuring the Application Load Balancer (ALB).