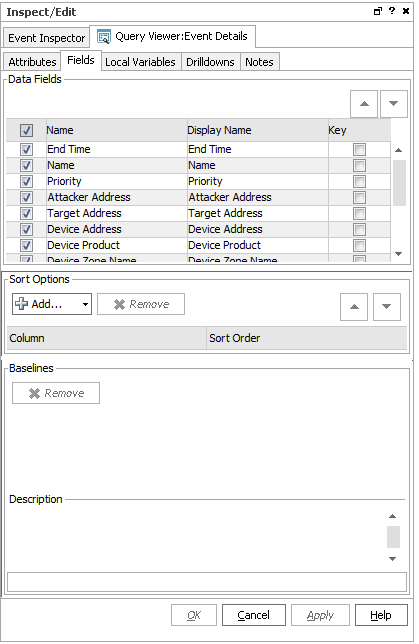
Query Viewer Fields
To define the data display, click the query viewer Fields tab.

The data fields shown on this tab are inherited from the base query. When a query viewer is first created, the data fields are shown here with the same settings they inherited from the base query for Use and Key fields. So, initially all fields are enabled for Use and fields that are grouped by columns in the base query show as Key fields here.
You have the option of overriding the base query settings for Use and Key settings on inherited data fields in the query viewer. (Settings here do not affect the base query.) You can override these settings when you first create the query viewer, or when you edit it later.
Select (check) Use for fields to display in the query viewer results. Fields not selected to Use do not show up in the query results.
Optionally, you can select one or more fields to use as Key fields. Key fields are columns that can be used to uniquely identify a role in the query. Only the fields selected as keys are used when doing baseline comparisons.

The query viewer displays results from these columns, showing them from left to right in the order specified. The above settings would result in a query viewer that shows Timestamp as the left-most column, followed by Name, and so forth. You can re-order the columns by selecting a row and clicking the up or down arrow to move it.
Sort Options
The query viewer inherits the sort options from the base query, but you can override those sort options here, without affecting the base query.
You can add data fields from the base query to sort the query results in the query viewer display.
Click Add ( ) to get the list of available fields and select those you want to sort on.

In the example above, the Timestamp is sorted from newest to oldest. Data with the newest Timestamp is at the top of the list. Data with the oldest Timestamp is at the bottom of the list. (This is indicated by the Z-A sort order and up arrow.) In a case where multiple rows have the same Timestamp, these are sorted by the Count(Event ID) from smallest to largest (as indicated by the A-Z sort order and down arrow).
You can change the priority of a column by selecting a column and clicking the up or down arrow to move it.
Note: It is possible to sort on fields that you choose not to display in the query result.
Suppose you decide to hide the timestamp and count (event ID) columns. In the query viewer Sort Options, you can still sort by Count (Event ID) and Timestamp.
The list of event names and results for this query viewer display in this multi-column sort order by timestamp and count (event ID), but those columns do not show up in the display.
Baselines
If any baselines have been set on results returned on this query viewer, those are listed in the Baselines area of the Fields tab.
Baselines are created on query results tables using the right-click popup option Analyze in Channel >Add as baseline... after a query runs. (See Defining and Using Baselines.)
When a query has one or more baselines available, you can compare the current results of a table view with the baseline.
To remove baselines from the query viewer, click the Fields tab, select the baseline name, and click Remove ( ). Be sure to click OK or Apply on the Query Viewer Editor to save your changes.
If you remove the baselines from the query viewer definition, they are not available on the next run of the query viewer.