Creating a Custom Column
Where: Navigator > Resources > Active Channels
-
Right-click a column header in an active channel and select Columns > Edit Custom Columns.
-
In the Custom Columns Editor, click Add and name your new column, for example, call it ABC Vendor.
If you want all Console users to see the new column (not just administrators), select the Share with all check box.
Tip: You can also toggle this option on or off later from the Cell Format tab.
Click OK.
-
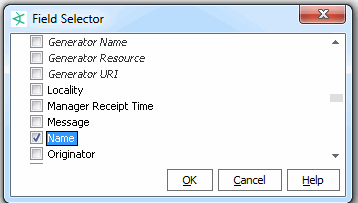
With the new column selected, click Field Selector and select the event attributes you want to display in this column. For example, for ABC Vendor, select Name and click OK.

The format field is automatically populated with the variable value in Velocity Template format. If appropriate, apply Java-compatible HTML formatting around the field strings. Remember to bracket such formatting with the HTML tag, such as
<HTML><B>$type</B></HTML>. -
Click Preview to see how the contents of the Format box will look in the active channel.
-
Click the ToolTip Format tab to define a tool tip.
-
Select a target event attribute in the Right-Click Field menu to populate variable right-click commands, when applicable.
-
Click Rename or Remove to change or remove selected items in the Custom Columns list.
-
Click Apply to put your changes into effect and Close to close the Custom Columns Editor.
You can edit custom columns after they are created, including toggling on/off the “Share with all” settings for a column, renaming it, changing its Field Selector mappings, and so forth.
Note: Custom columns are not available as arguments for inline filtering.