Editing AccuWork Connection Settings
To edit the
AccuWork connection settings:
-
Go to the
AccuSync Management Console main page.
Tip: Clicking the AccuSync logo at the top of any page takes you to the main page.
-
On the
AccuSync Management Console main page, double-click the
AccuWork Configuration you want to edit.
The
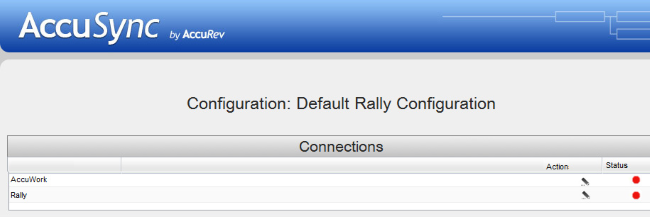
Configuration page for the configuration you selected appears.

-
Click the
Edit Configuration button
 .
.
Note: The Status column displays the stop iconThe Edit AccuRev Connection dialog box appears. at this point because the connection has not yet been established. For more information about the connection status icons,
see
Connections Table: Action and Status Information .

-
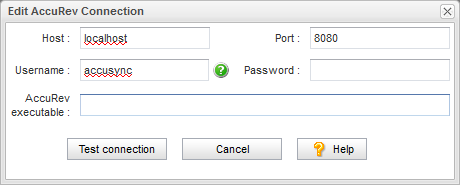
Specify the values required to connect to
AccuWork:
- Host and Port
- These are the values that correspond to the AccuRev installation with which you will be synchronizing your ITS.
- Username and Password
- Be sure to enter the username and password of the AccuSync user you created specifically for AccuSync. See Create the AccuSync User for more information.
- AccuRev executable
- Use this field to optionally specify the absolute path of your AccuRev executable (accurev.exe). If you leave this field empty, AccuSync looks for accurev.exe in your systems’s PATH.
-
Click the
Test Connection button.
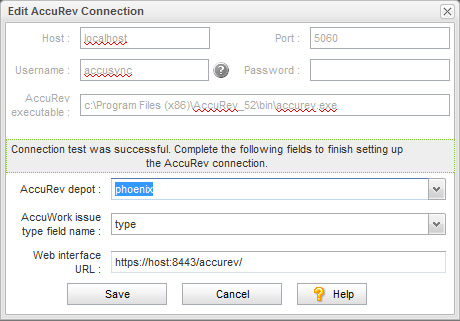
When the connection succeeds, a new panel appears on the
Edit AccuRev Connection dialog box.

-
Complete the remaining fields as follows:
- AccuRev depot
- Choose the depot you want to synchronize with your ITS. When you select a depot, a default value appears in the AccuWork issue type field name field.
- AccuWork issue type field name
- The internal name of the field that displays the issue type (defect, task, and so on) on the
AccuWork
Issue Edit Form. Unless you have changed the name in the
AccuWork schema, the name of this field is type.
Note: The field’s name typically differs from its label. For example, the field named type is displayed on the Issue Edit Form using the label Type.
- Web Interface URL
- Enter the URL for the machine hosting the AccuRev Web Interface. For example: http://localhost:8080/accurev/.
- Click the Save button. The revised configuration appears in the Configurations table on the AccuSync Management Console main page.