Creating a Role by Using the Location of the User Objects
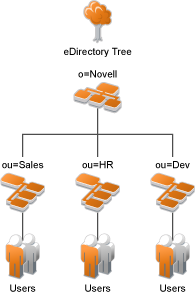
If you have created your users in specific containers in your LDAP tree, you can use these container objects to assign users to roles. For example, your LDAP tree looks similar to the following tree:

Such a tree organization can be used to control access to resources. Perform the following steps to create a Role policy for the users created under the Sales container:
-
On the Home page, click Policies > Policies.
-
Select the policy container, then click New.
-
Specify a name for the Role policy, select Identity Server: Roles for the type, then click OK.
-
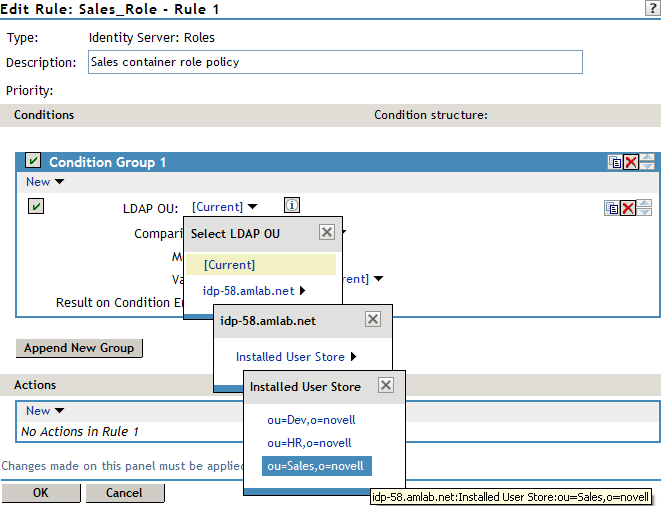
In Condition Group 1, click New, and select LDAP OU > [Identity Server Configuration] > [User Store] > [DN of the OU].
The following example illustrates how to make these selections:

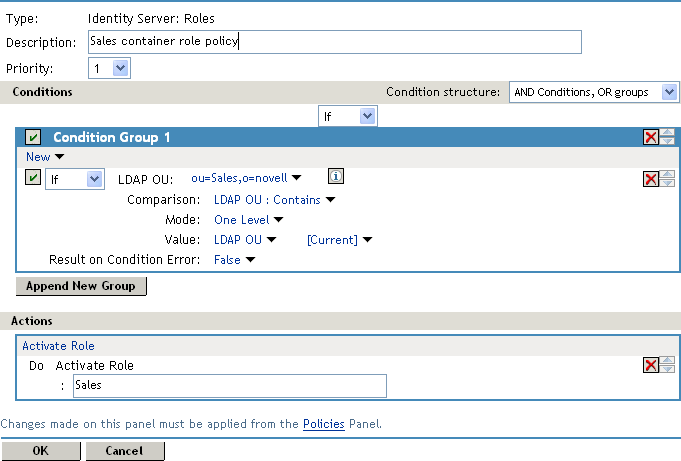
Comparison: Select how you want the attribute values to be compared. For LDAP OU, select Contains.
Mode: Select One Level if all your users are created in ou=Sales. Select Subtree if your users are created in various containers under the ou=Sales container.
Value: Select LDAP OU, then select [Current].
The DN of the authenticated user is compared with the value specified in LDAP OU. If the DN of the user contains the LDAP OU value, the user matches the condition. For example, if the DN of the user is cn=bsmith,ou=sales,o=novell and the LDAP OU value is ou=sales,o=novell, the user matches the condition. If you selected Subtree for the Mode, a user with the following DN also matches the condition: cn=djones,ou=provo,ou=sales,o=novell.
Result on Condition Error: This sets up the results that are returned if an error occurs while evaluating the condition (for example, the LDAP server goes down). This rule is set up to grant the user the role of Sales if the condition evaluates to True. If an error occurs, you do not want random users assigned the role of Sales. Therefore, for this rule, you need to select False.
-
In the Actions section, click Activate Role.
-
In Activate Role, specify Sales and click OK.
The name you specify here is the role you want assigned to the users who match the condition.

-
Click OK > OK > Apply Changes.
-
On the Home page, click Identity Servers > [cluster name] > Edit > Roles.
-
Select the check box next to the name of the role, then click Enable.
-
Click OK.
-
Update Identity Server.
You can now use this role when creating Authorization and Identity Injection policies, which control access to protected web resources. For more information, see the following: